In this guide, we will learn how to install R and RStudio on Windows, macOS, Linux, and UNIX [FreeBSD] and get our machine ready for some statistical research and data science.
The whole R and RStudio installation on all the above-mentioned operating systems takes no more than 5-10 minutes. R is a free programming language and software environment for statistical computing and graphics created and maintained by the R Foundation for Statistical Computing. R is also a very popular programming choice among data scientists and statisticians for statistical computing, data mining, and design.
To use R to its maximum potential, you need to install two components on your machine: the R language and the RStudio Desktop IDE. This article covers both installations.
Install R and RStudio on Windows
Select a CRAN mirror
Open a browser and navigate to CRAN R-project website. CRAN is a set of worldwide distributed mirror servers to provide global coverage and fast download speeds for R setup and R packages. Select a mirror server that is nearest to your location.
 Select a CRAN mirror closest to your location for faster downloads
- On the Download and Install R section, click on Download R for Windows.
 Click "Download R for Windows" to proceed
- On the Download for Windows section, click on the base sub-directory.
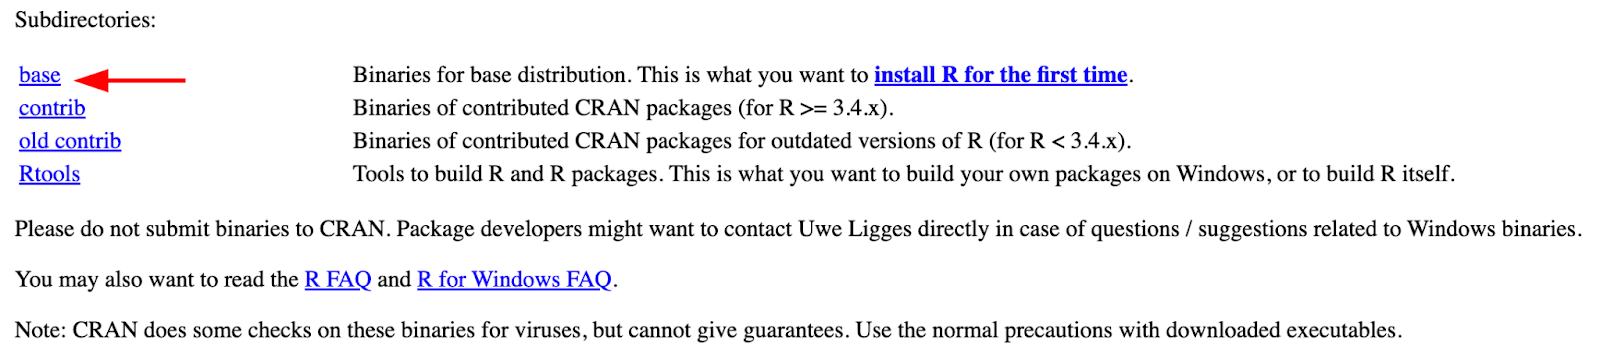 Select the "base" subdirectory to download the installer
- Click on the latest R release for Windows 32/64bit. At the time of writing this guide, the latest version is R 4.0.4 but by the time you read this guide, a new R version might be available.
 Download the latest R version for Windows
- Once the download is completed, click on Open File to launch the installer. Alternatively, you can find and launch the R installer from your Download folder.
 Click "Open File" to launch the R installer
- Select Yes when prompted to allow this app to make changes to your computer.
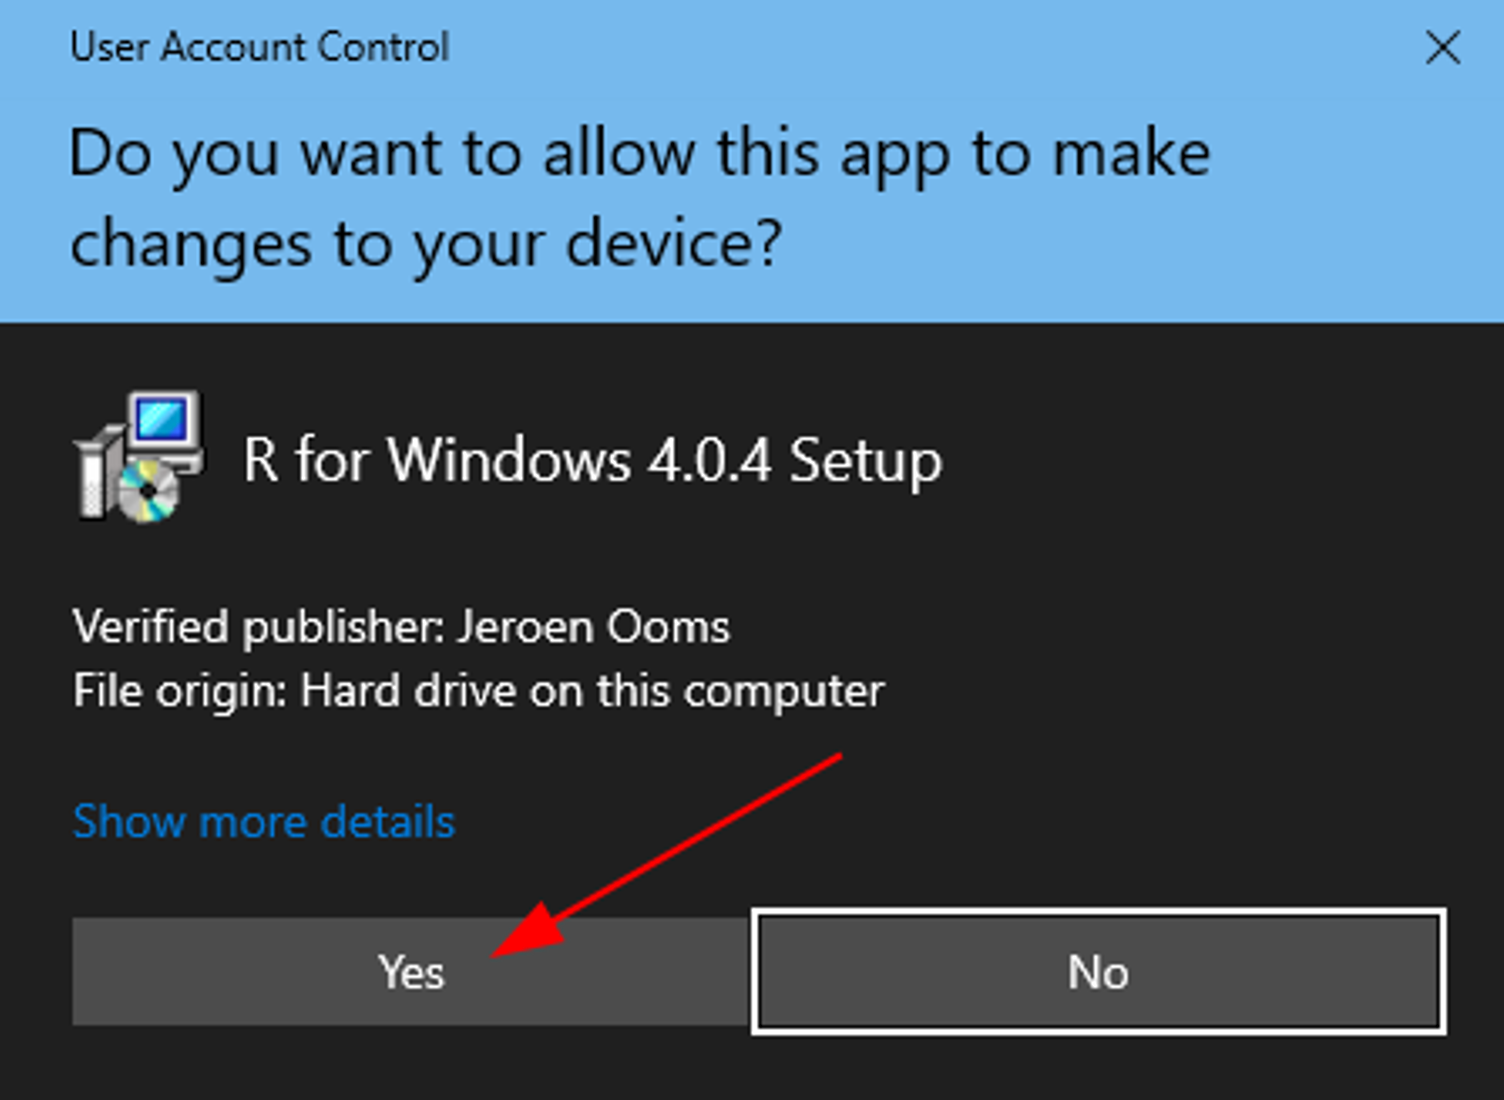 Allow the R installer to make changes to your computer
- On the Select Setup Language dialogue box, select your language and click OK.
 Select your preferred language and click OK
- On the Information window, review the GNU General Public License agreement and click Next.
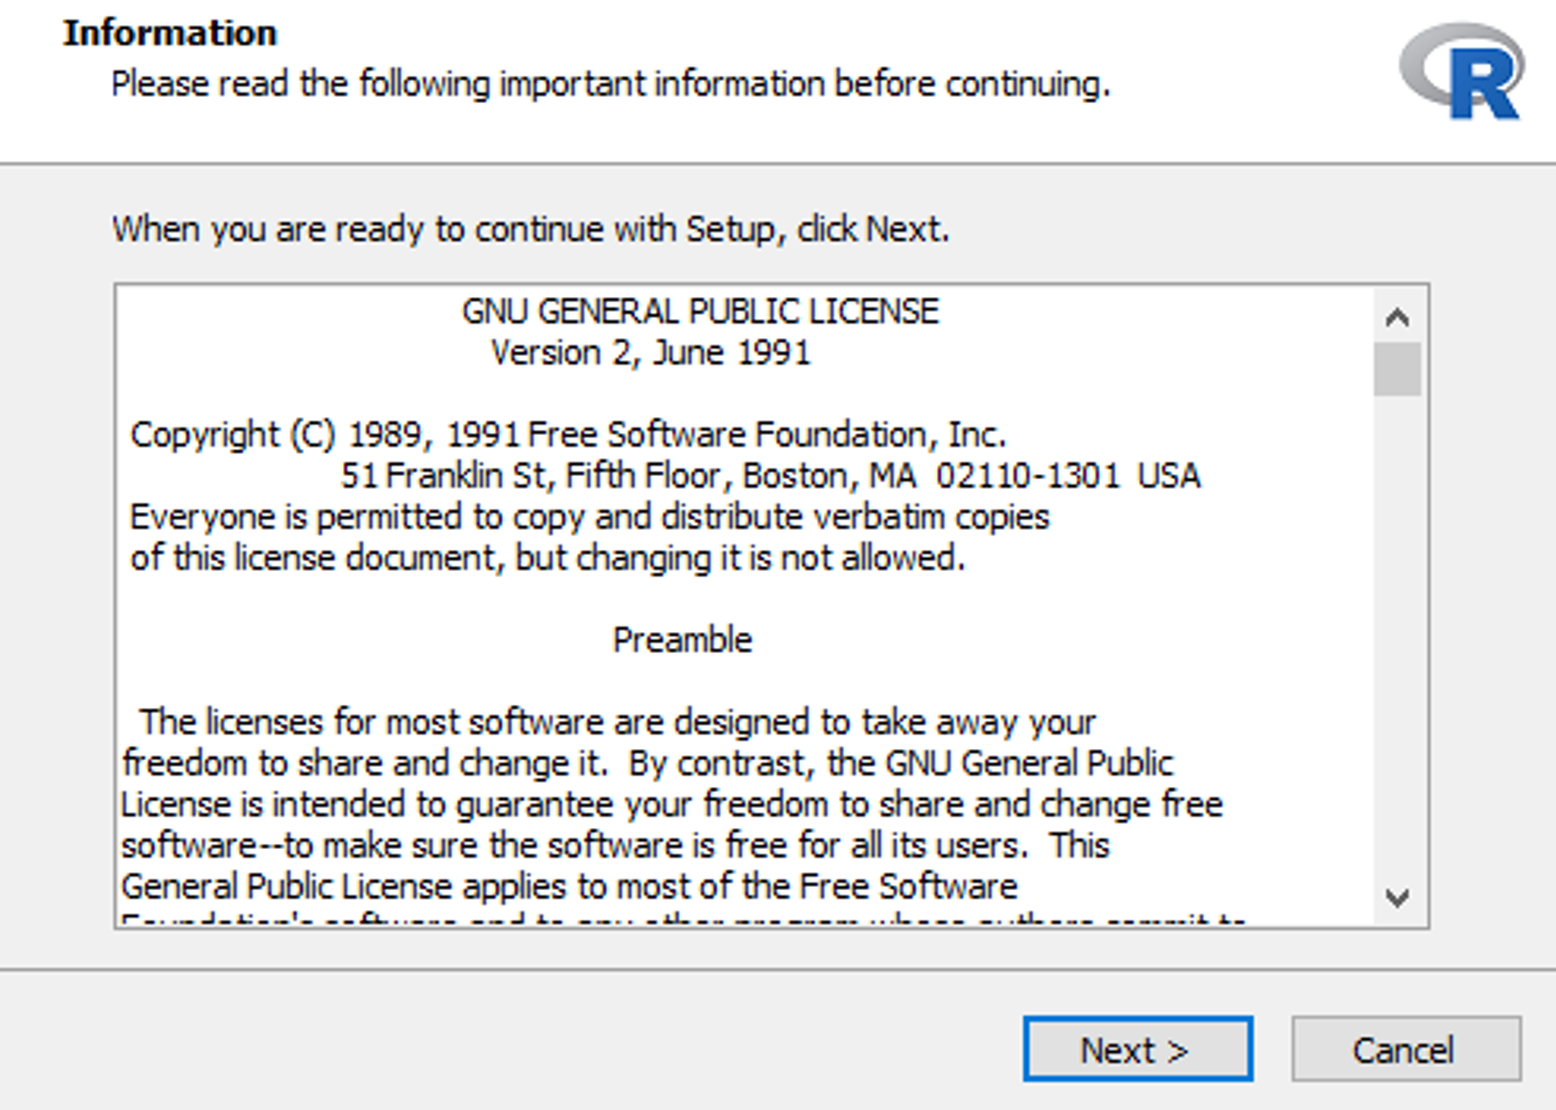 Review the GNU General Public License agreement
- On the Select Destination Location, click Next.
 Choose the installation directory or keep the default location
- Leave the default settings on the Select Components window to avoid 32/64 bit package compatibility issues later. Click Next.
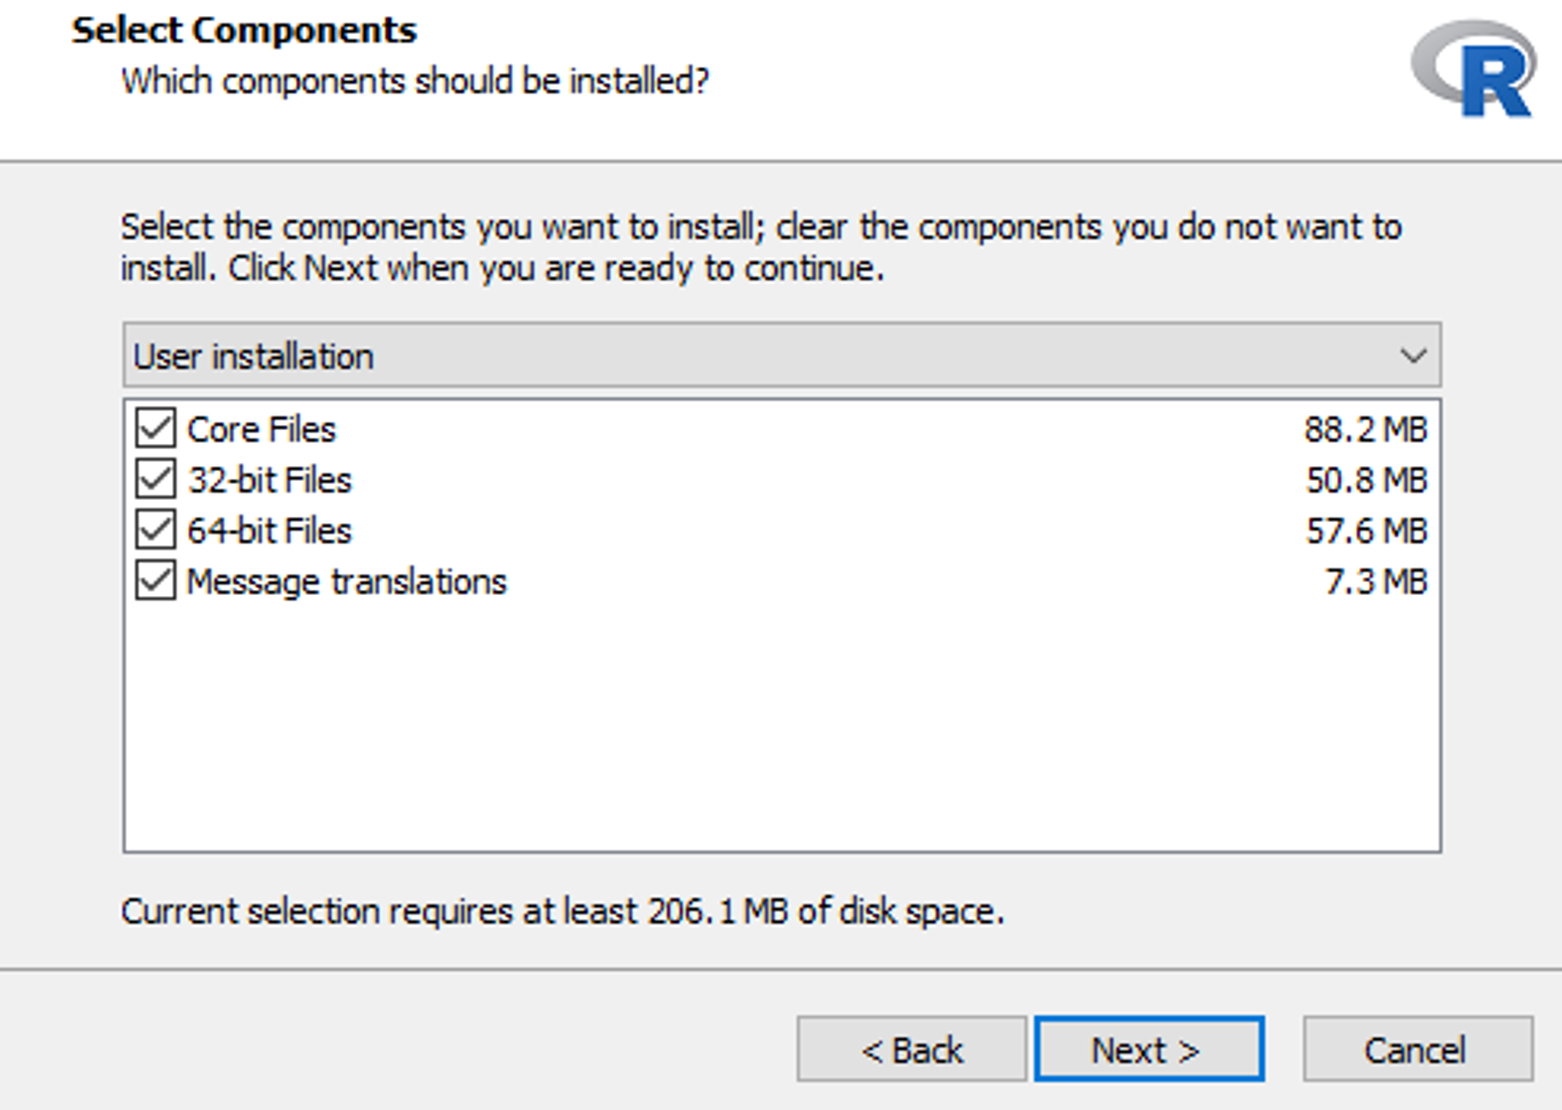 Keep default settings to avoid package compatibility issues
- On the Startup Options window, you can customize the installation further. For most cases, the default settings are sufficient. Leave the default No option selected and click Next.
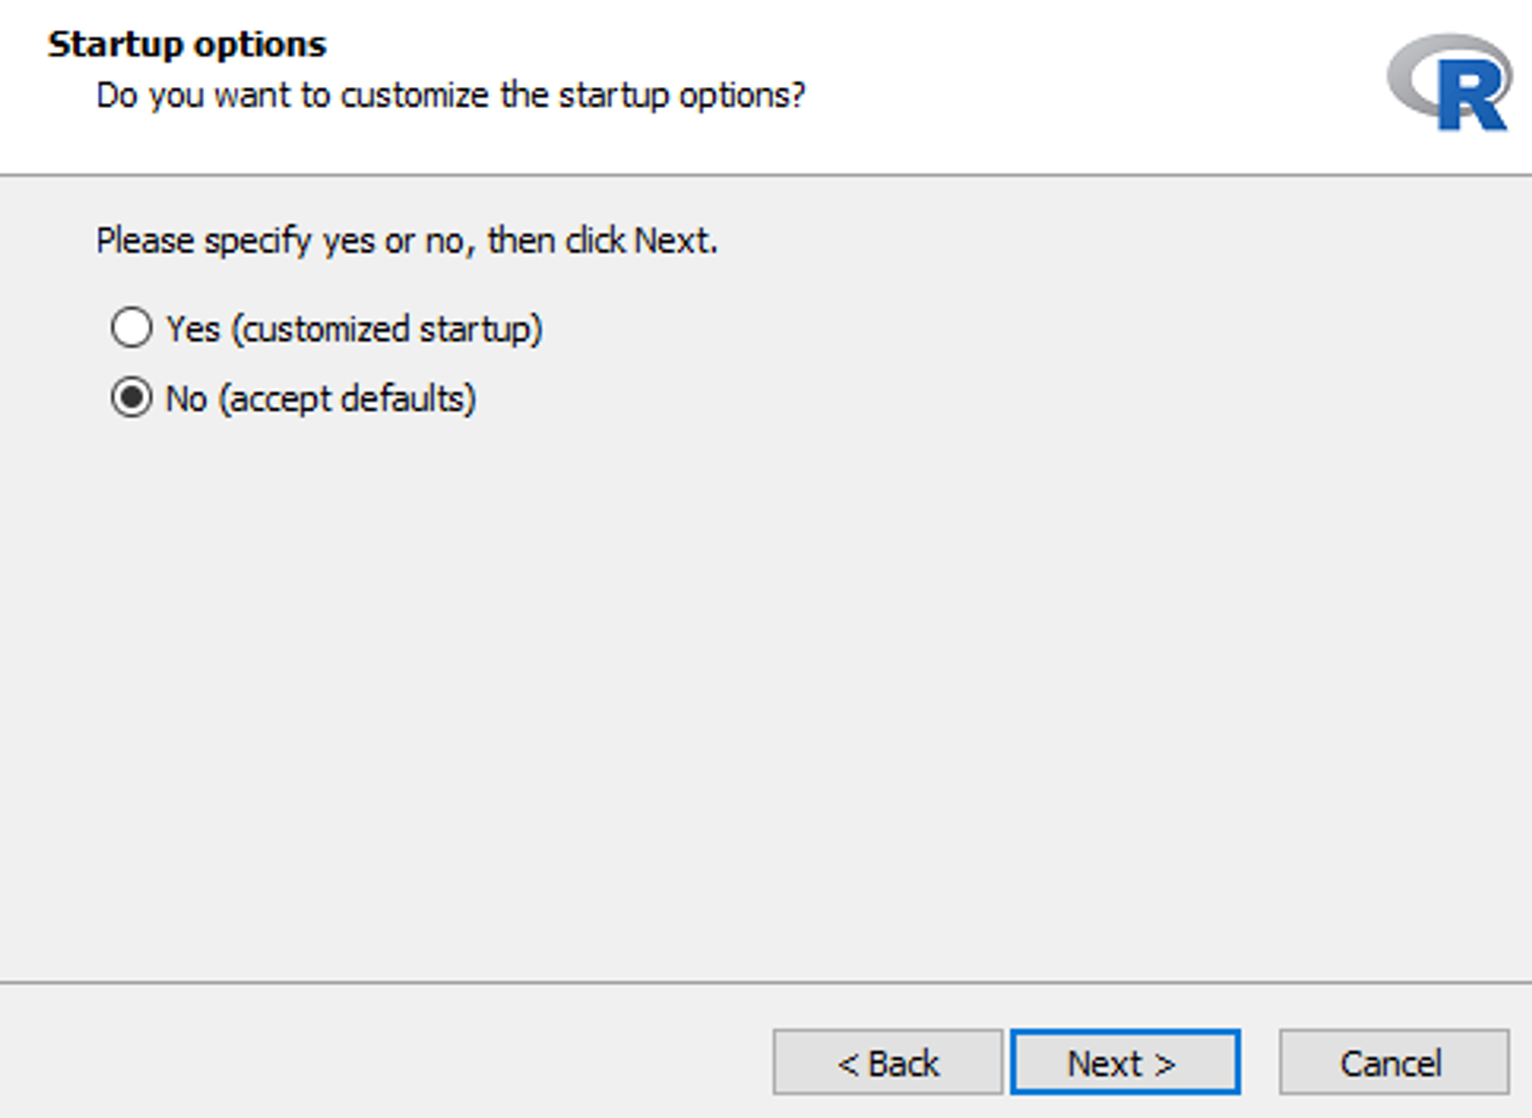 Leave the default "No" option selected for startup customization
- On the Select Start Menu Folder window, leave the defaults and click Next.
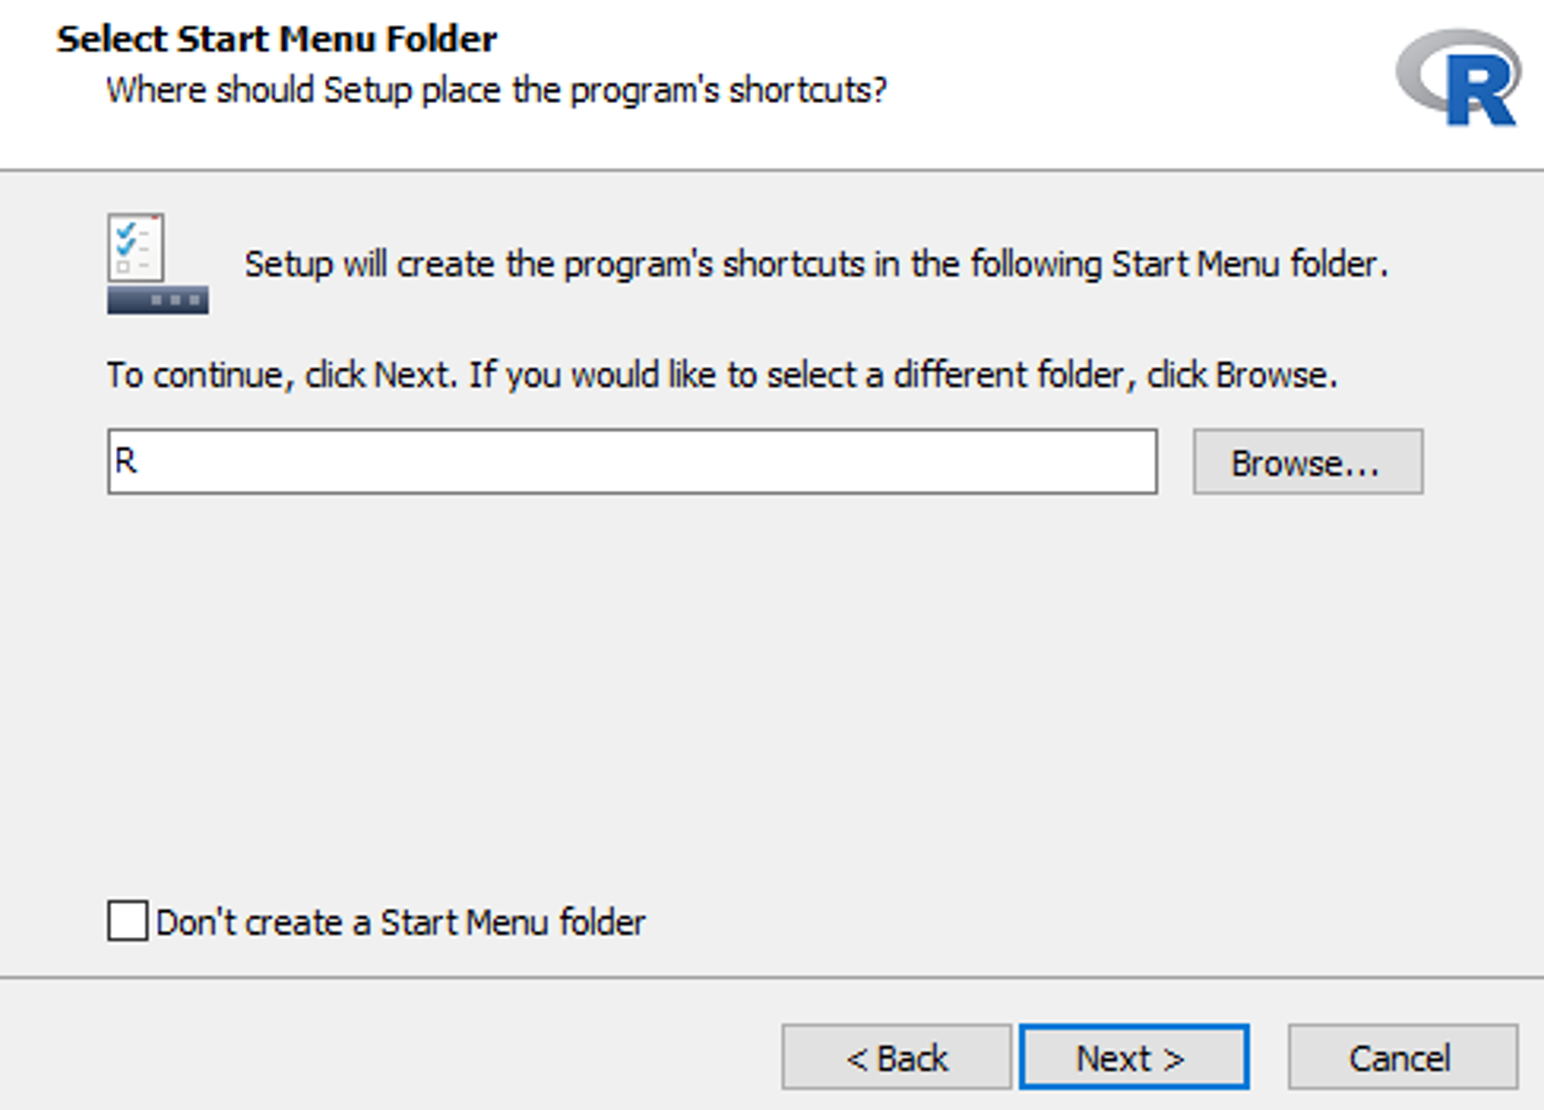 Keep the default Start Menu folder location
- You can choose to create a Desktop or Quick Launch shortcut or proceed with the Select Additional Tasks window’s default settings. Click Install.
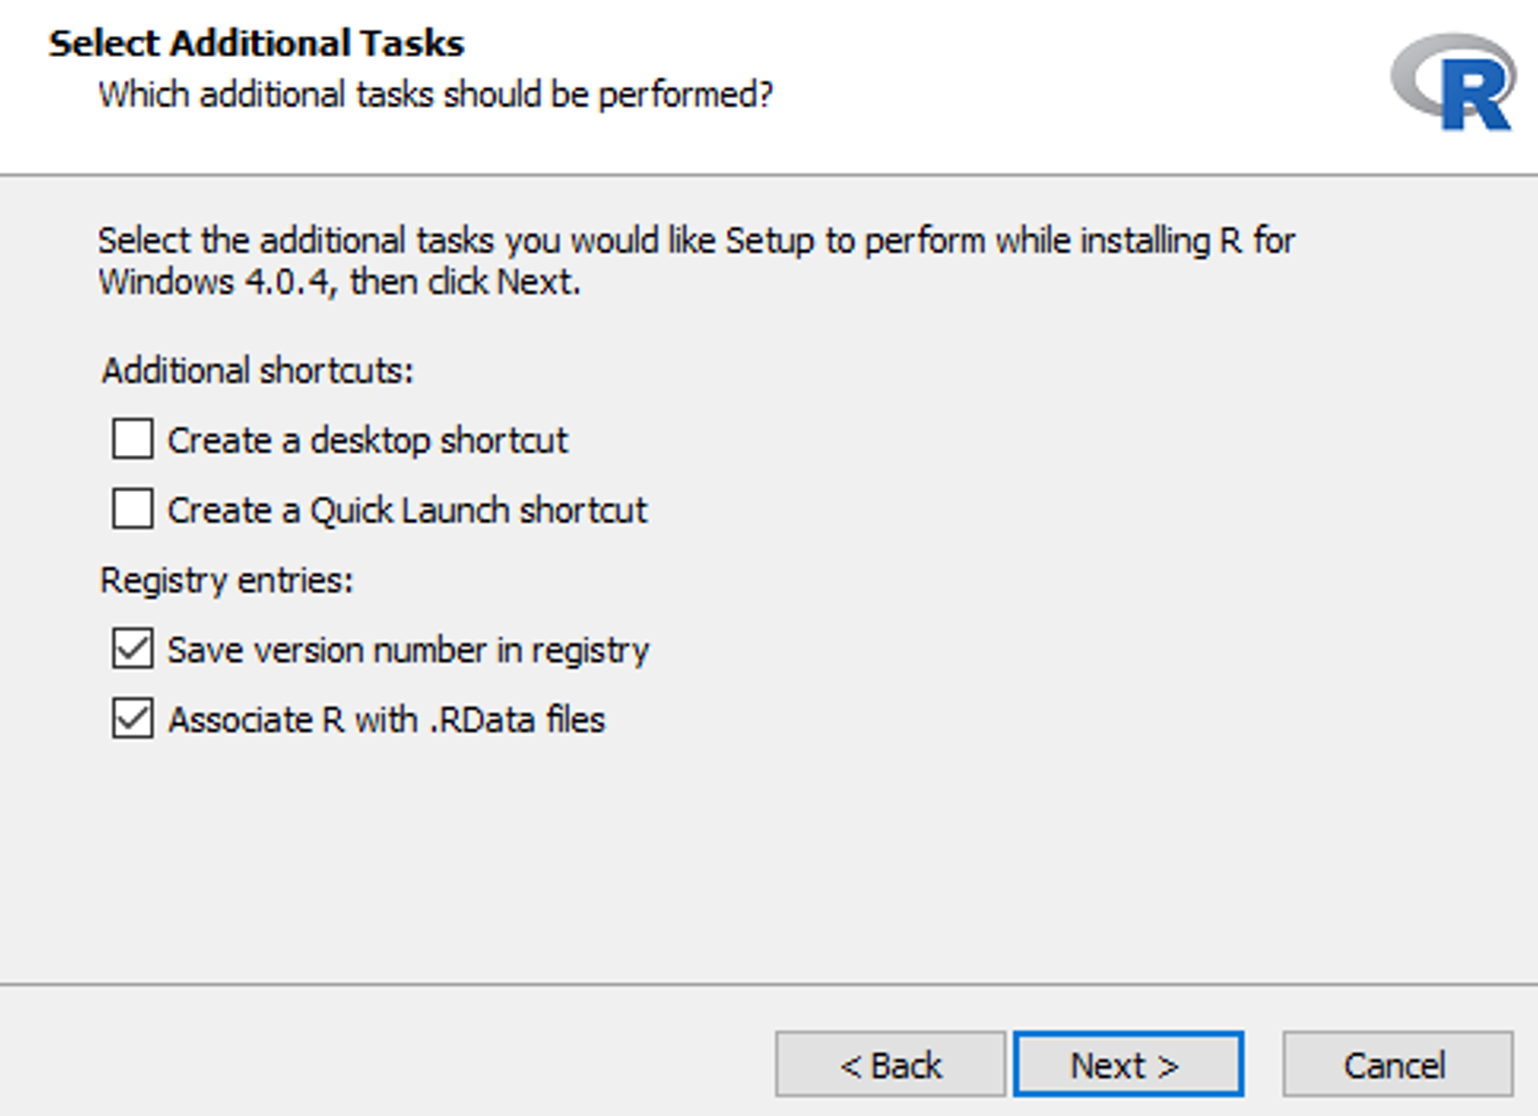 Optionally create desktop or quick launch shortcuts
- Windows will proceed to install R on your system. Once completed, click Finish to close the installation window.
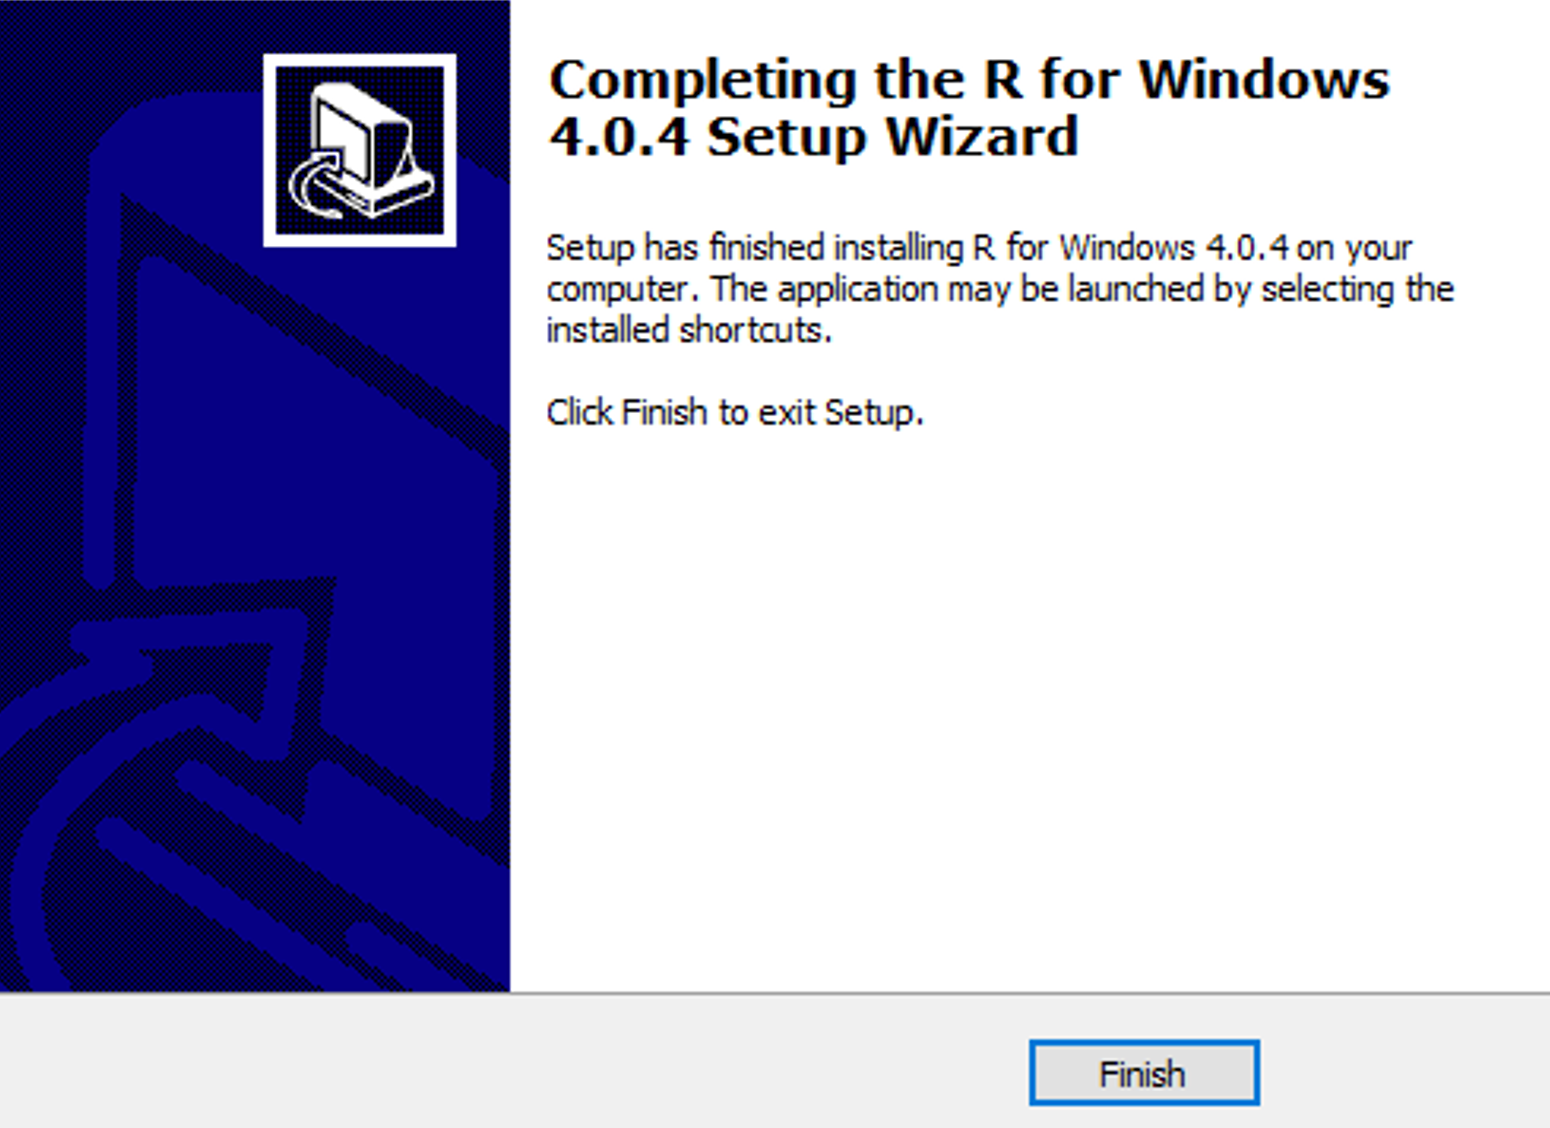 R installation completed successfully
At this time, the R language is installed on our Windows machine. However, if you launch R now, you will be greeted by a console and a prompt. To make things much easier for us, we can install a front-end IDE for the R language called RStudio.
The RStudio IDE is a series of interconnected tools designed to enable you to code in R and Python more efficiently. It provides a console, syntax-highlighting editor that facilitates direct code execution, and a range of comprehensive resources for plotting, scanning, debugging, and handling the workspace.
- To download RStudio Desktop IDE on your Windows computer, head over to the RStudio Desktop website, scroll down to the Download section and select the RStudio Desktop Free option. Click the Download button.
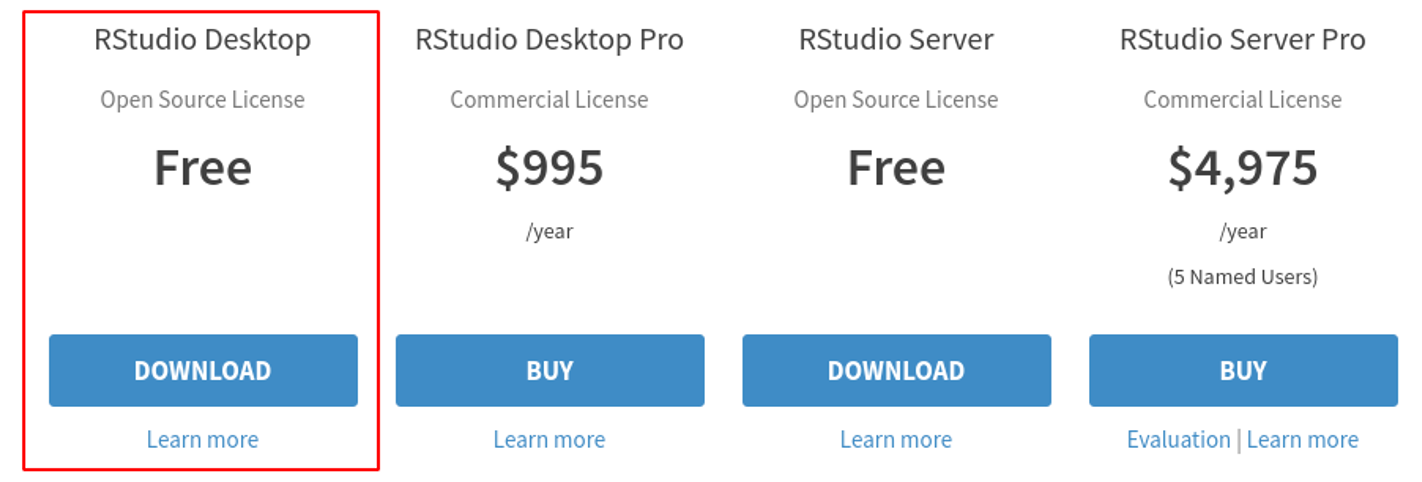 Select the free RStudio Desktop version and click Download
- In the All Installers section, download the Windows 10/8/7 .exe installer.
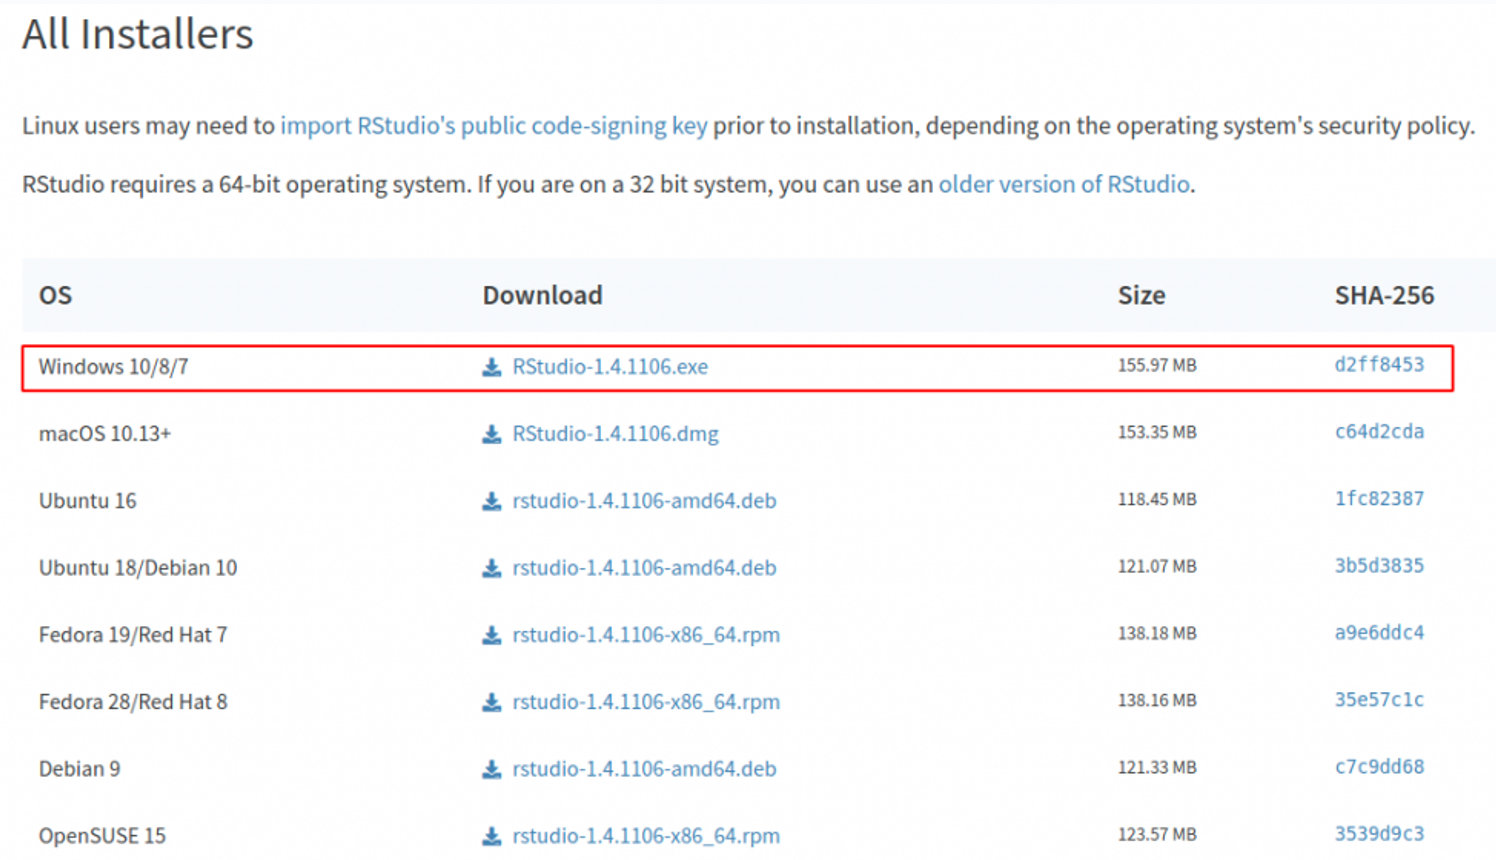 Download the Windows 10/8/7 .exe installer
- Once the download is completed, click Open File to launch the RStudio Desktop Installer. The RStudio installer can be also found in your Download folder.
 Launch the RStudio installer from your Downloads folder
- Select Yes when prompted to allow this app to make changes to your computer.
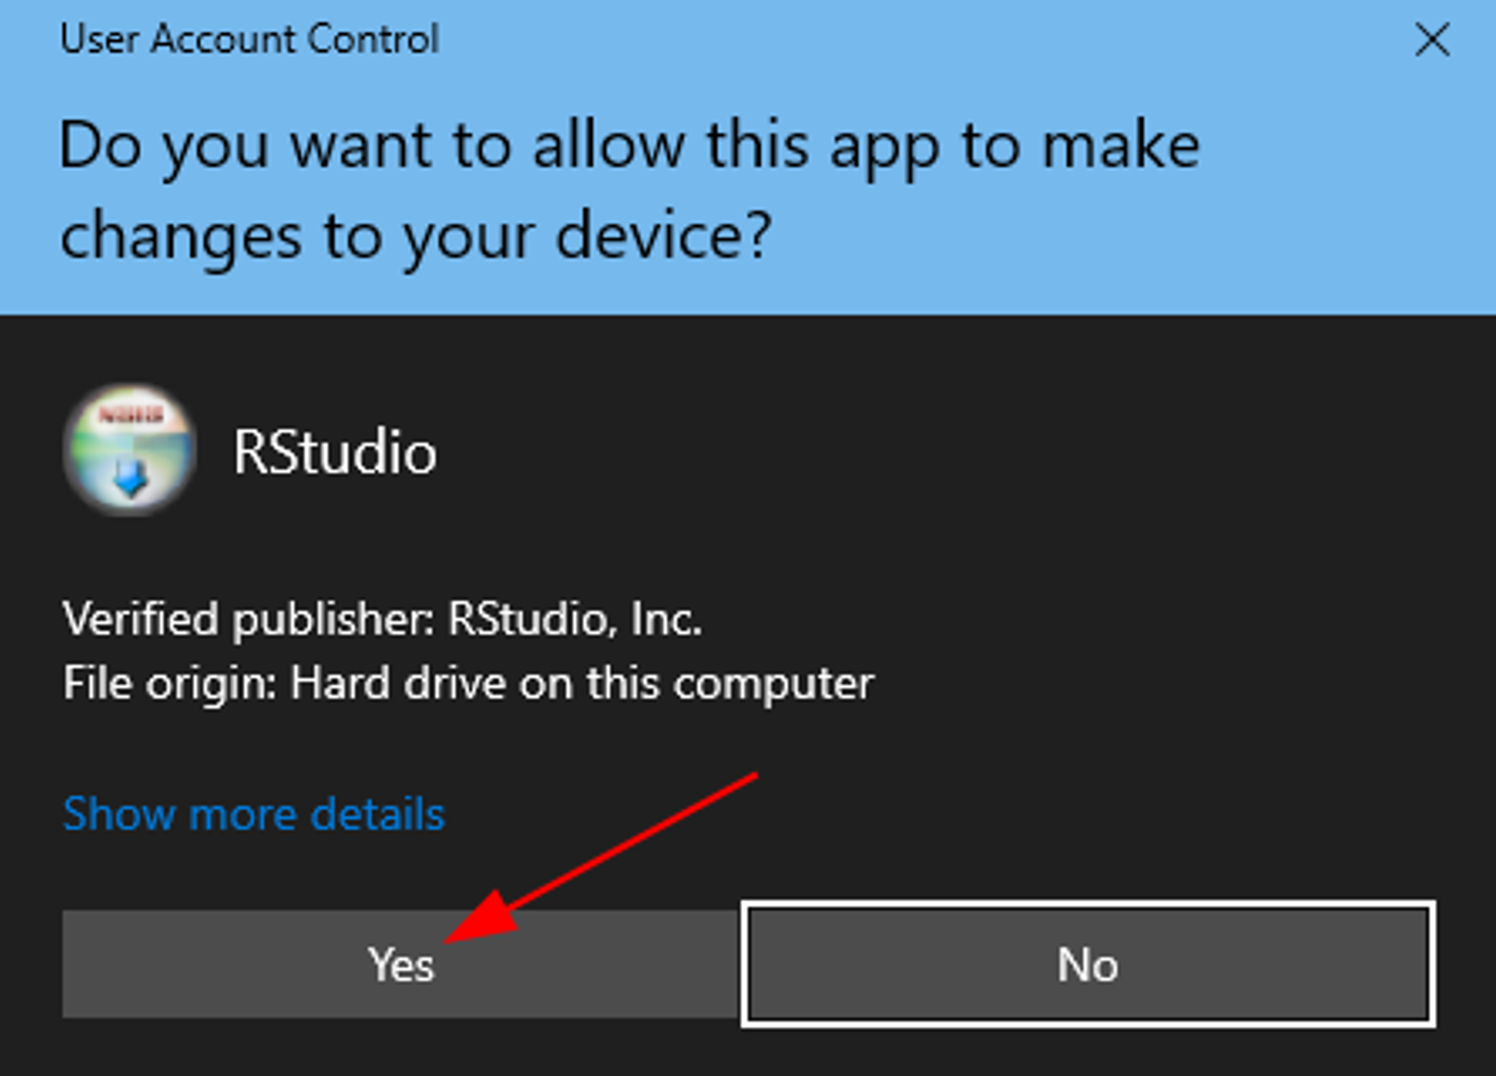 Allow RStudio installer to make changes to your computer
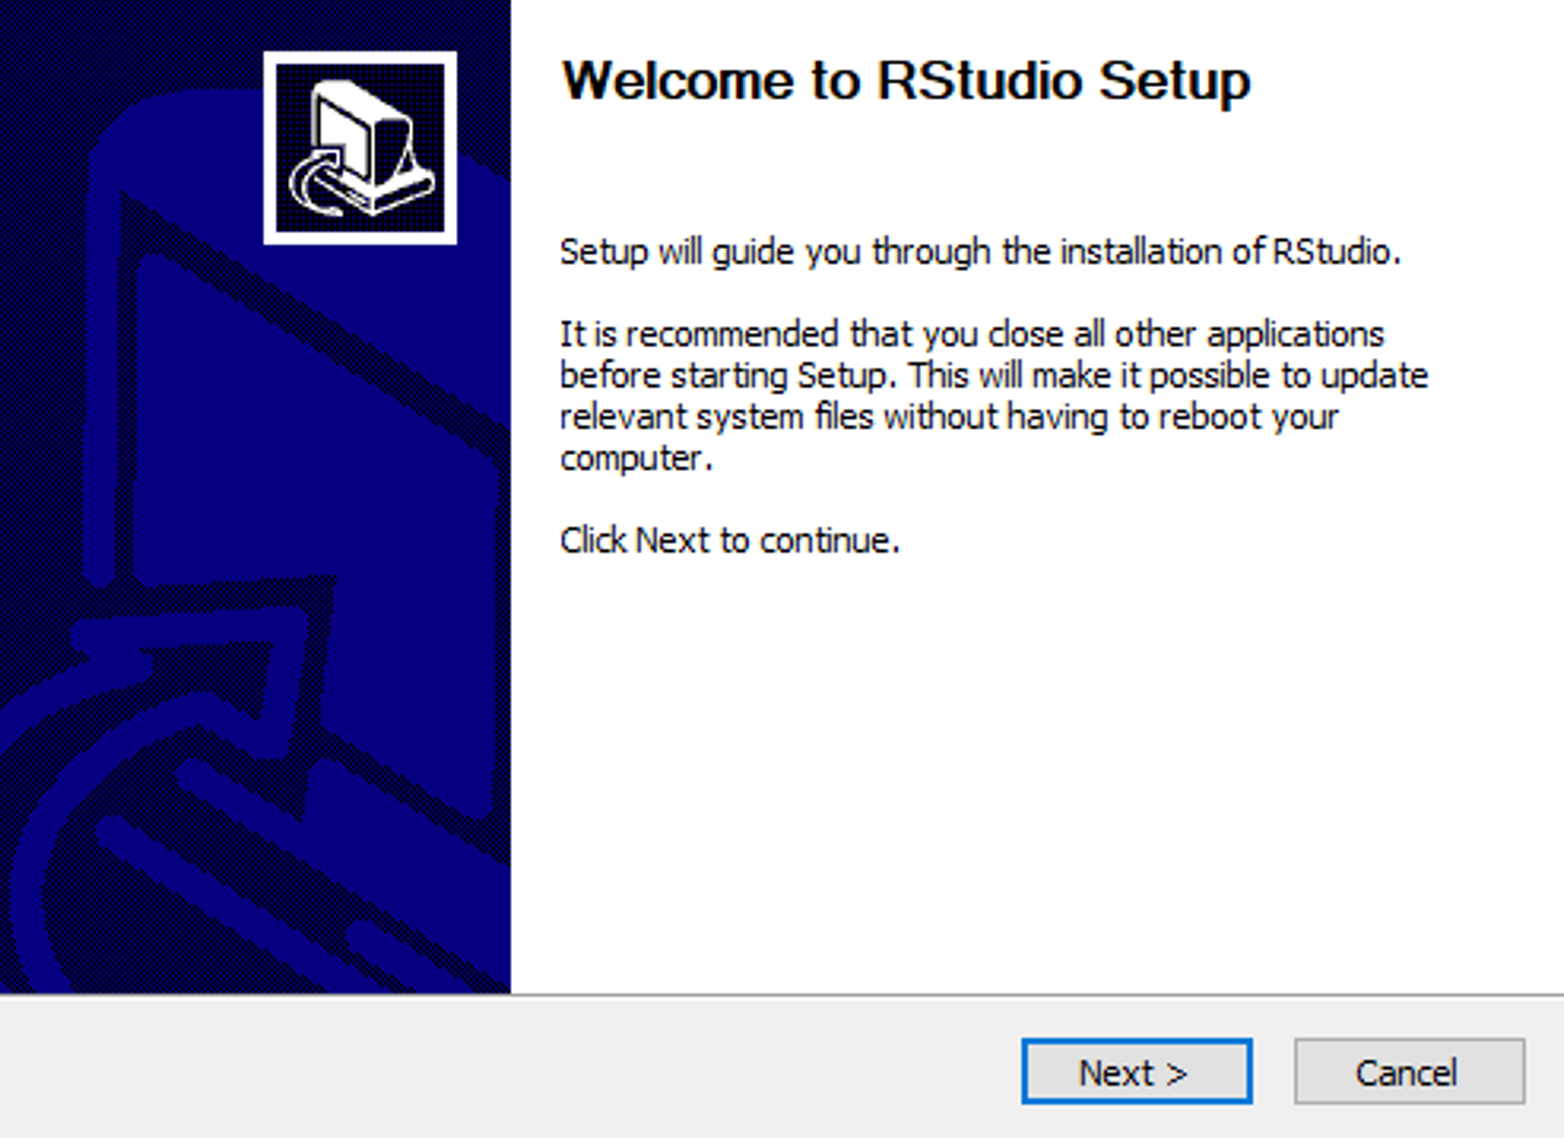
- On the Welcome to RStudio Setup window, select Next.
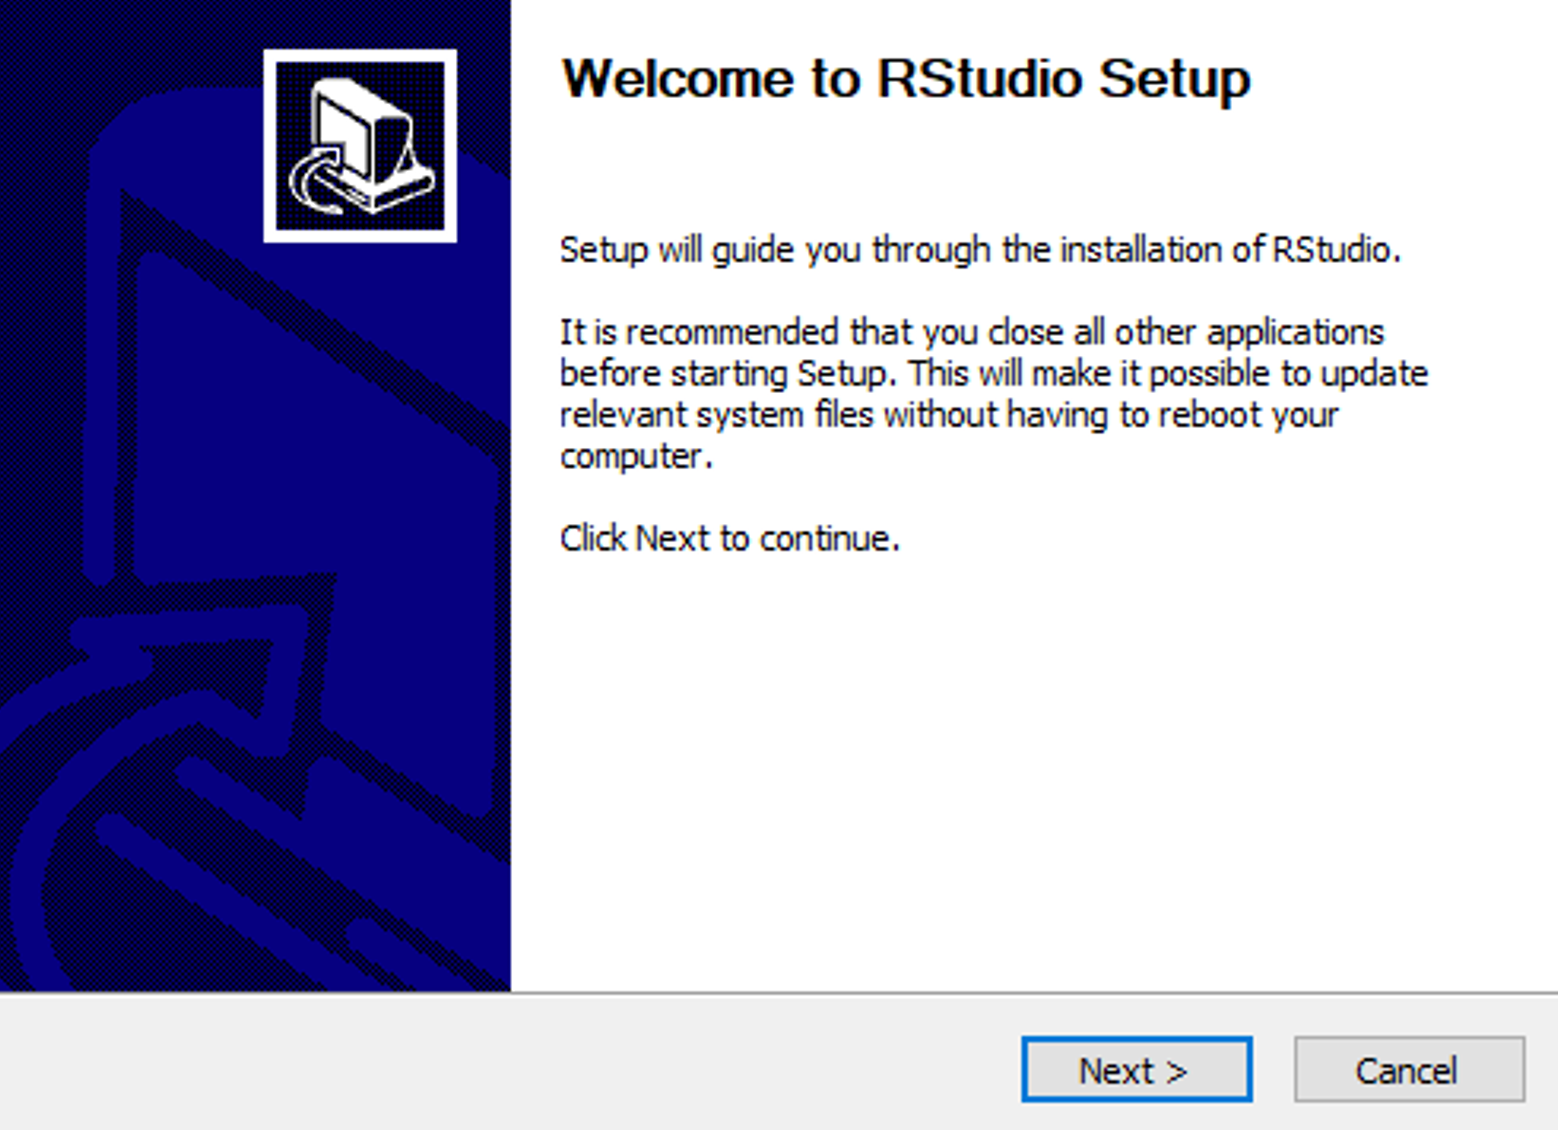 Welcome to the RStudio Setup wizard
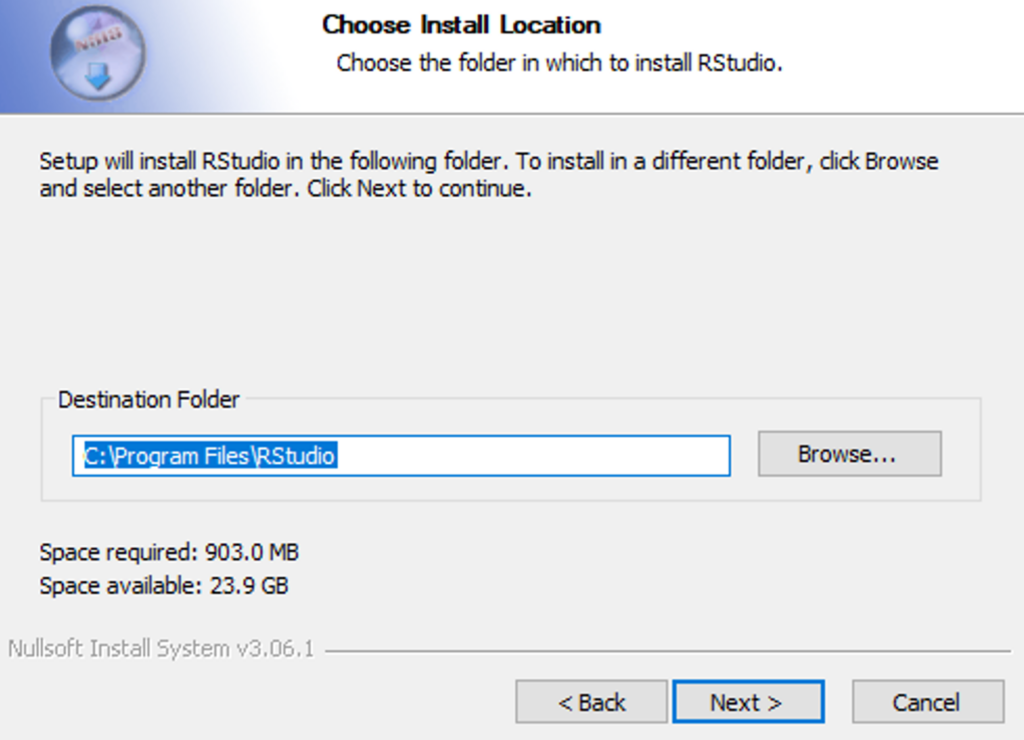
- On the Choose Install Location window, select Next.
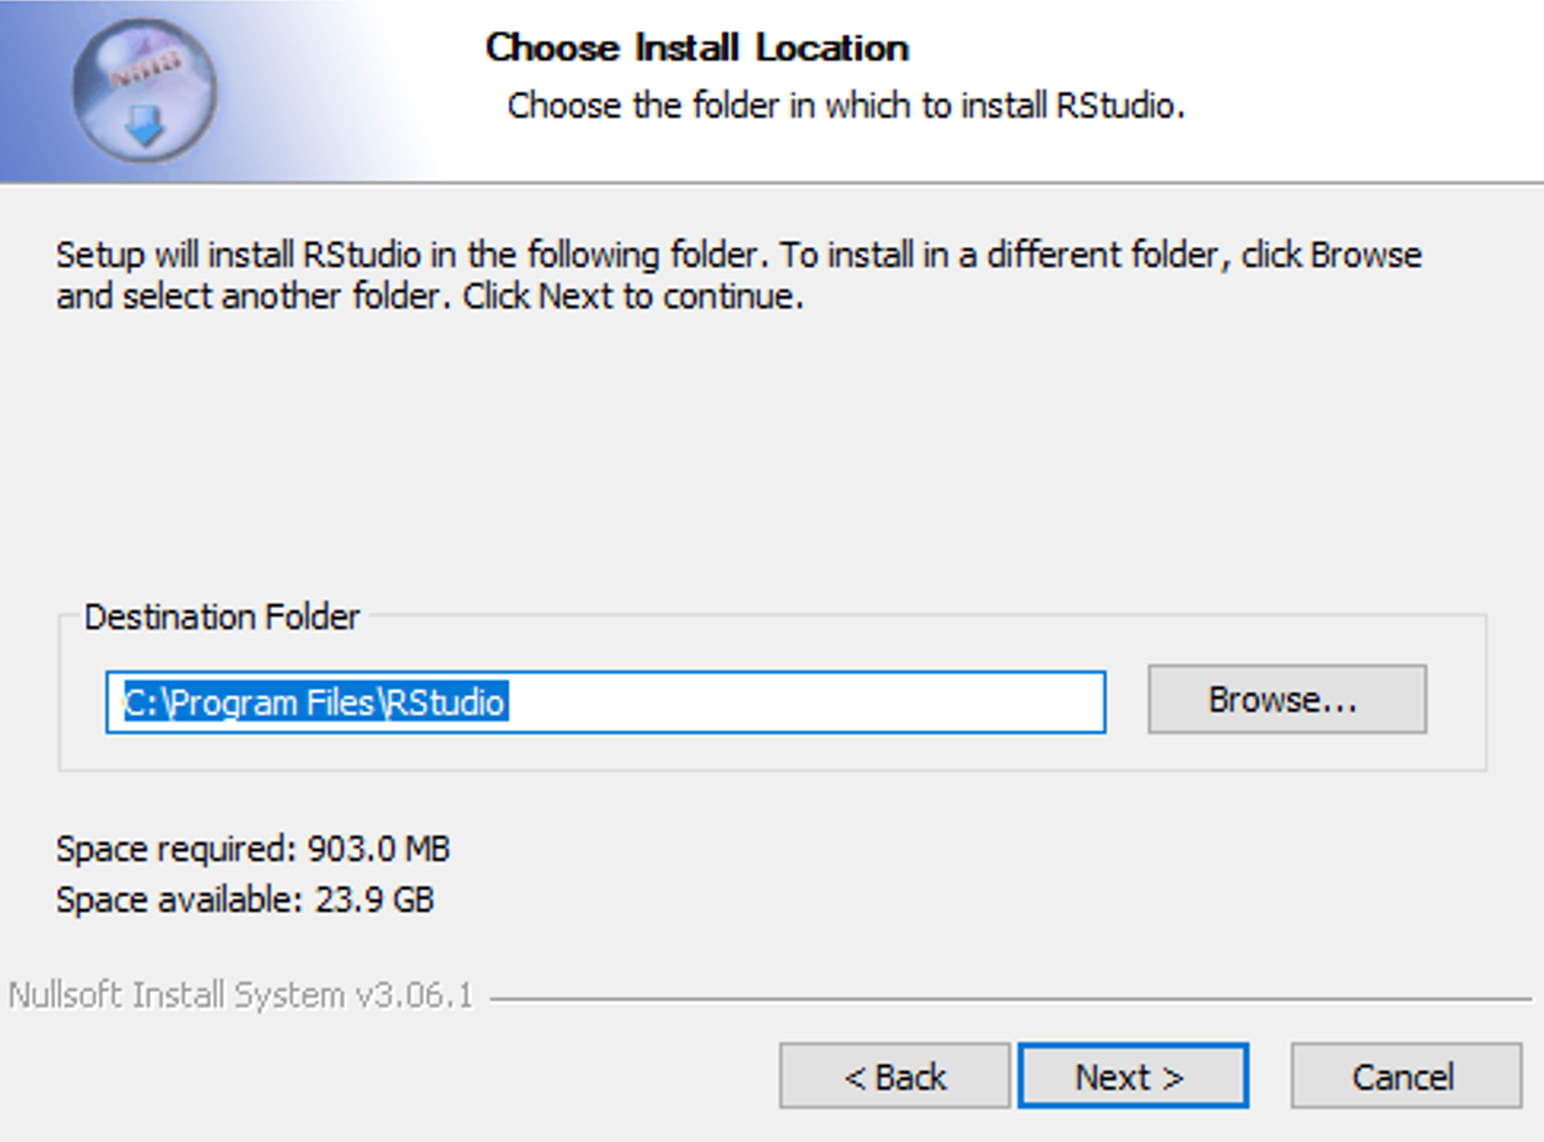 Select the installation directory for RStudio
- On the Choose Start Menu Folder window, select Install.
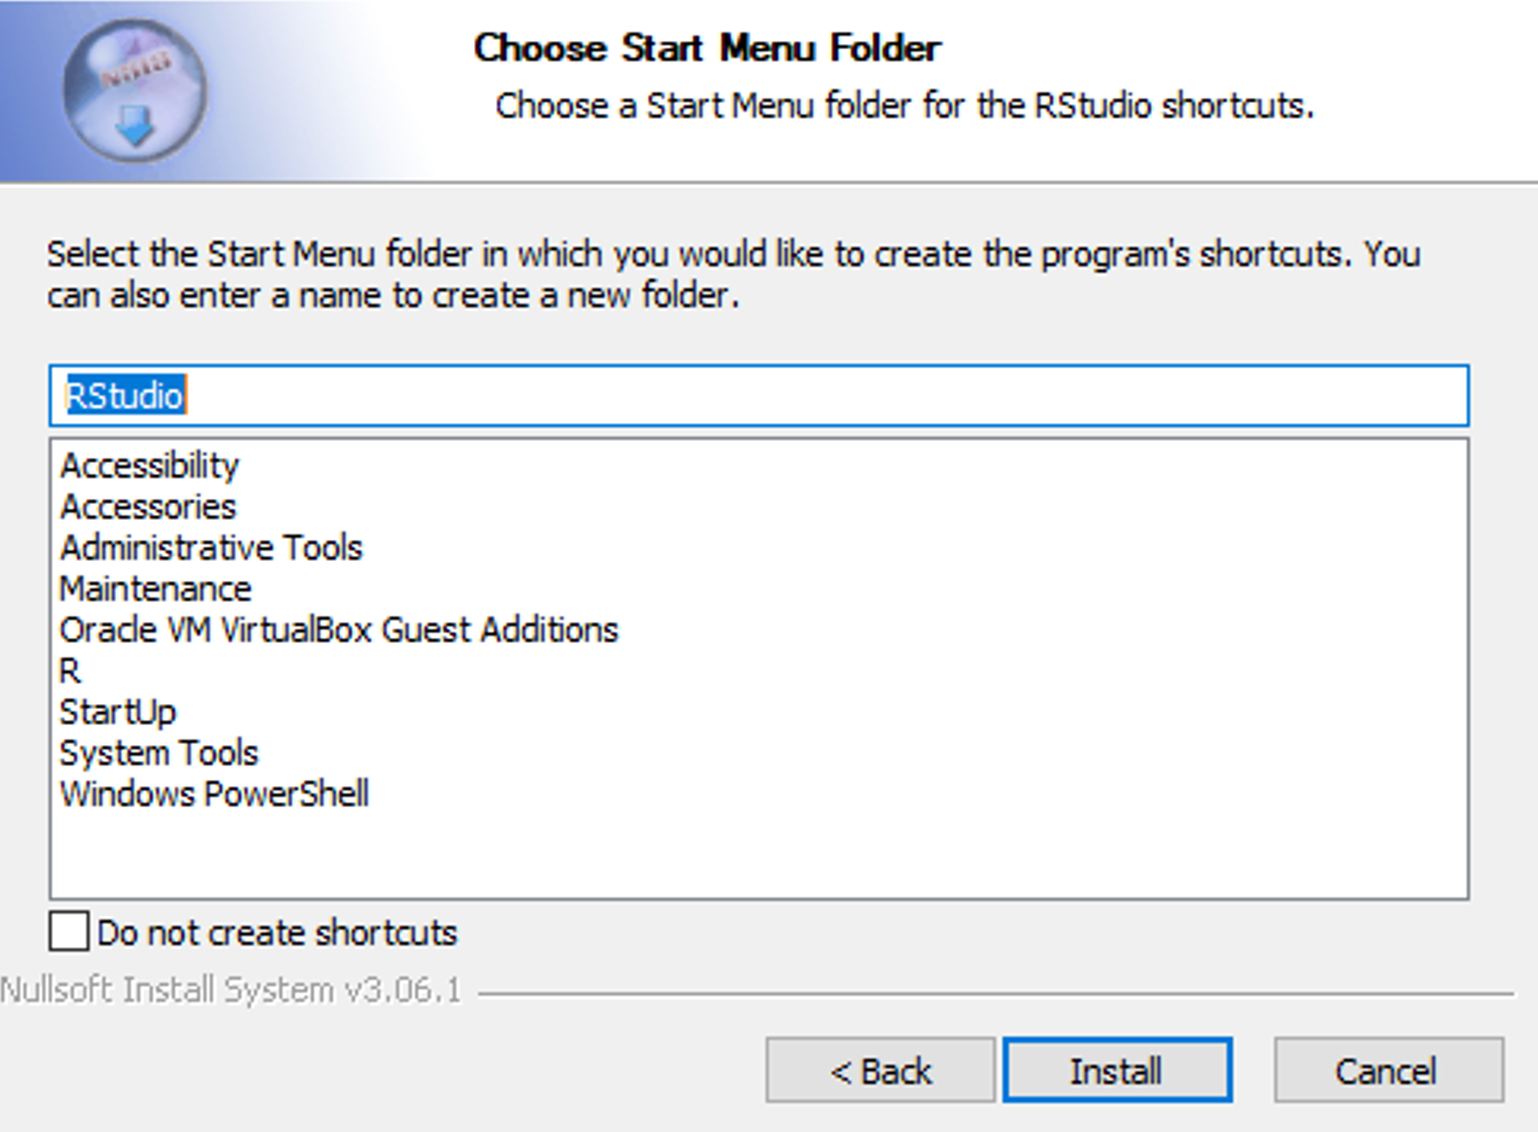 Choose the Start Menu folder and click Install
- The RStudio Setup will proceed with the installation on your Windows machine. Once completed, click Finish.
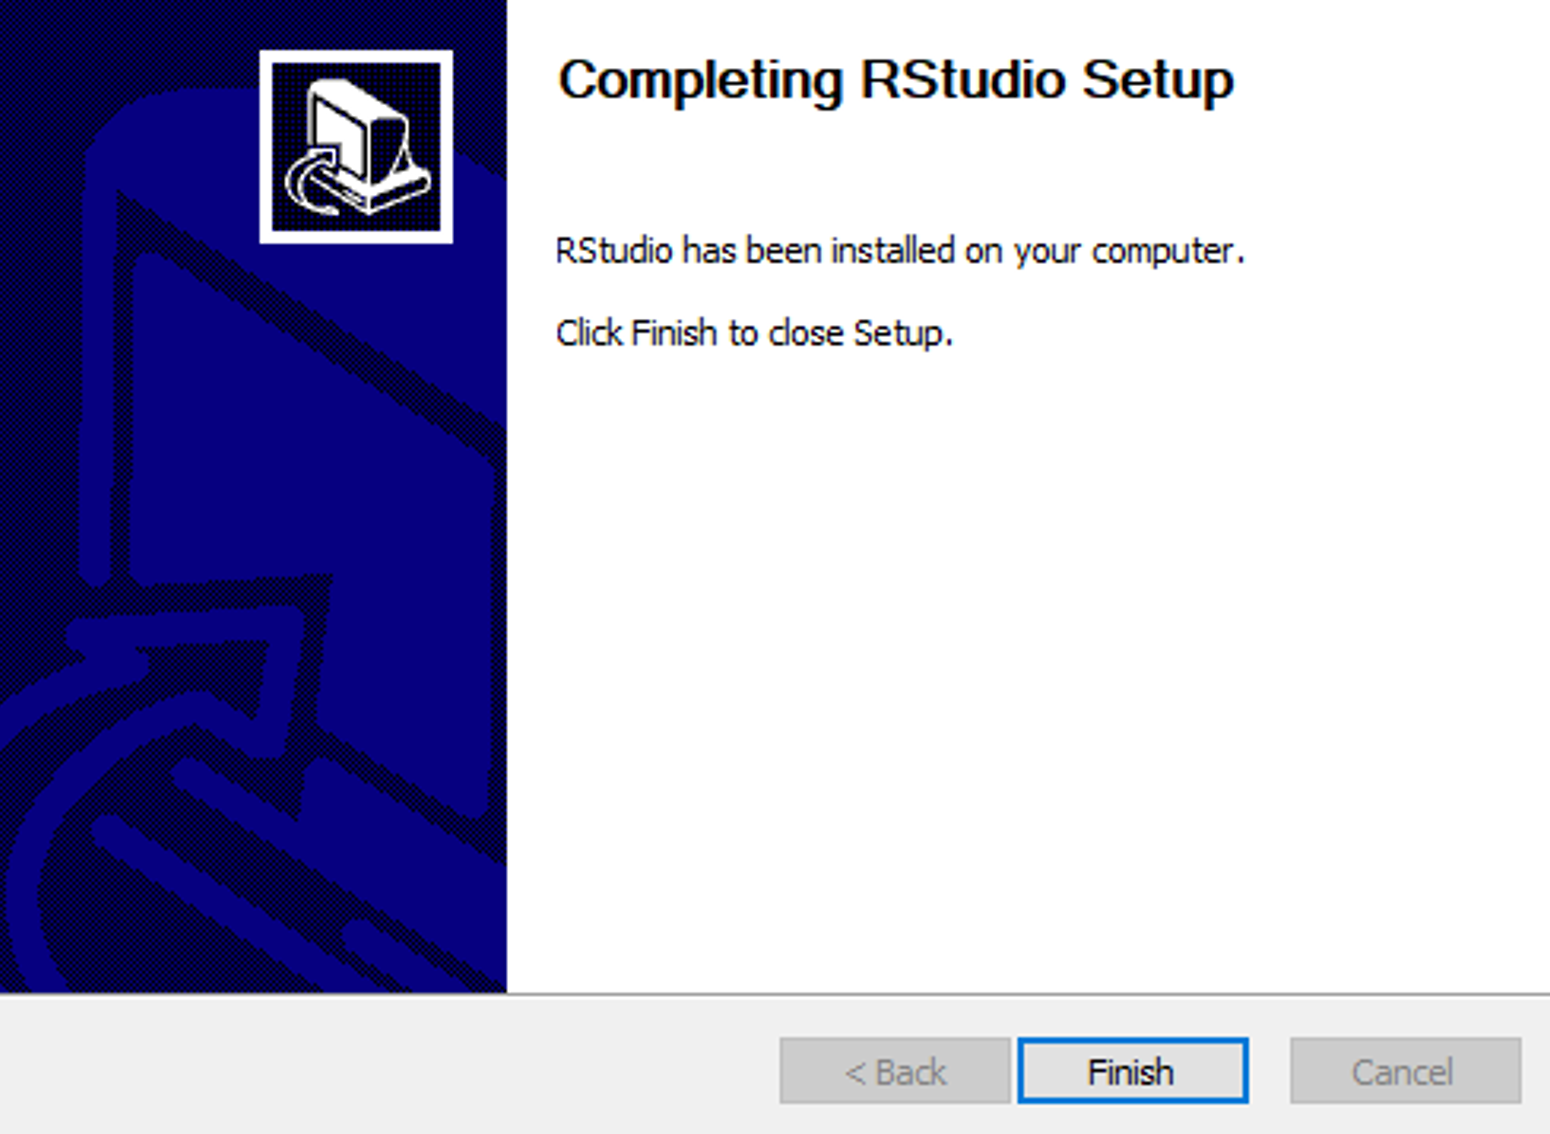 RStudio installation completed successfully
- To launch RStudio, click the Search icon on the Windows bar, search for RStudio and launch the RStudio IDE on your machine.
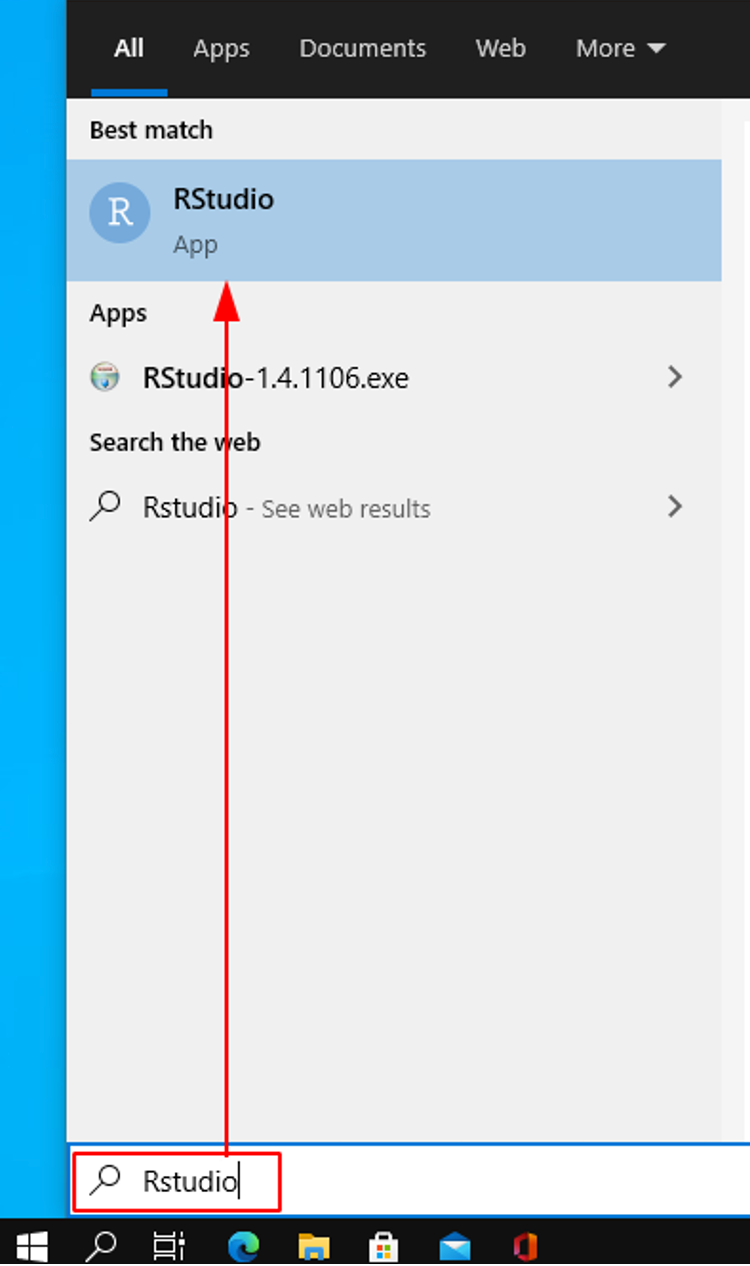 Search for RStudio in the Windows search bar
- When prompted to Enable Automated Crash Reporting, click Yes.
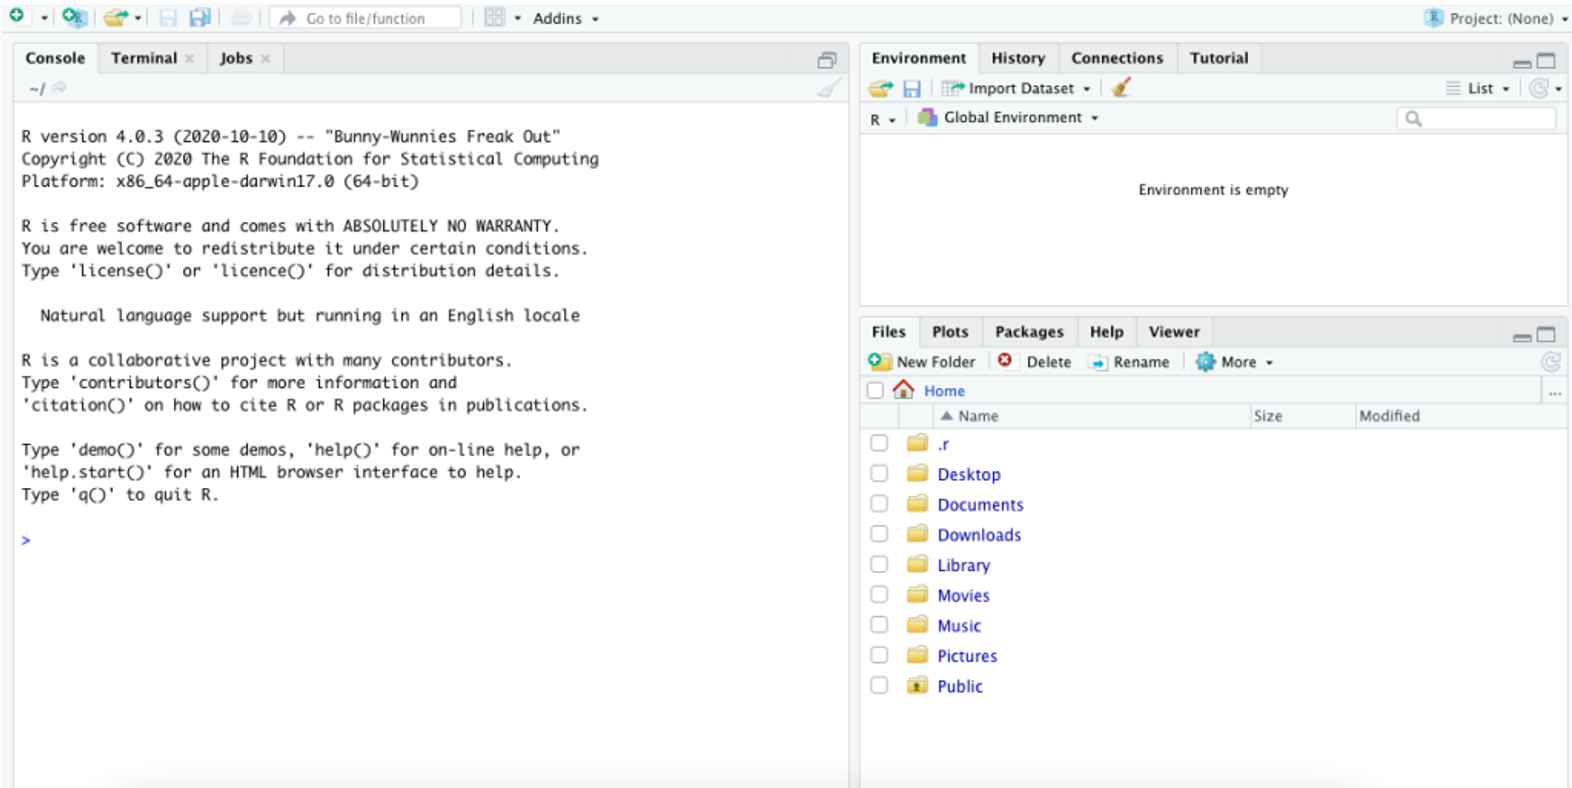 Launch RStudio on Windows
You've successfully installed R and RStudio on Windows! Next, learn how to install packages in R using RStudio.
Install R and RStudio on macOS
Select a CRAN mirror
Open a browser and head over to CRAN R-project website. CRAN is a set of worldwide distributed mirror servers to provide global coverage and fast download speeds for R installers and R packages. Select a mirror server that is nearest to your country.
Select a CRAN mirror closest to your location
- On the Download and Install R page, click on Download R for (Mac) OS X
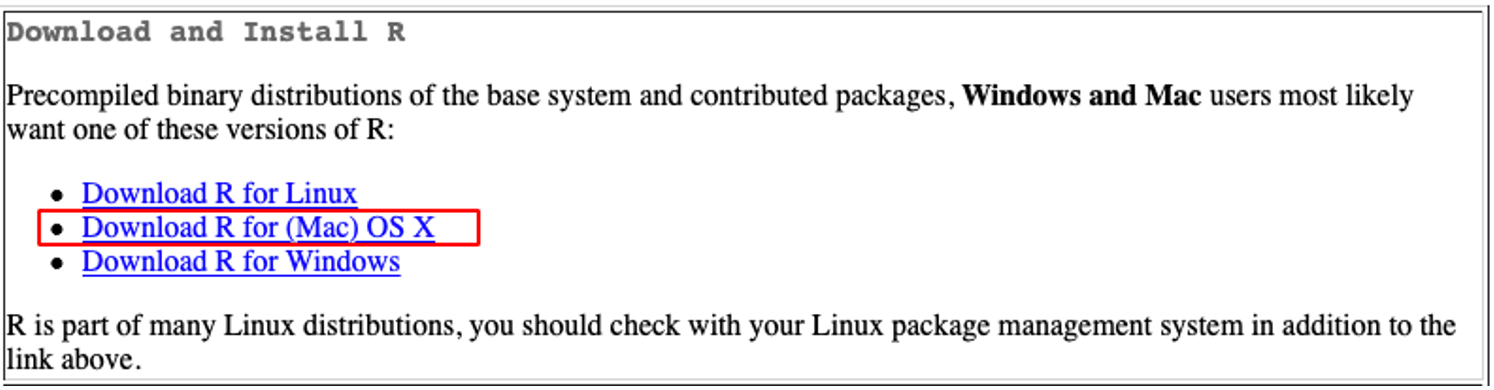 Click "Download R for (Mac) OS X"
- On the R for Mac OS X page, download the latest .pkg release.
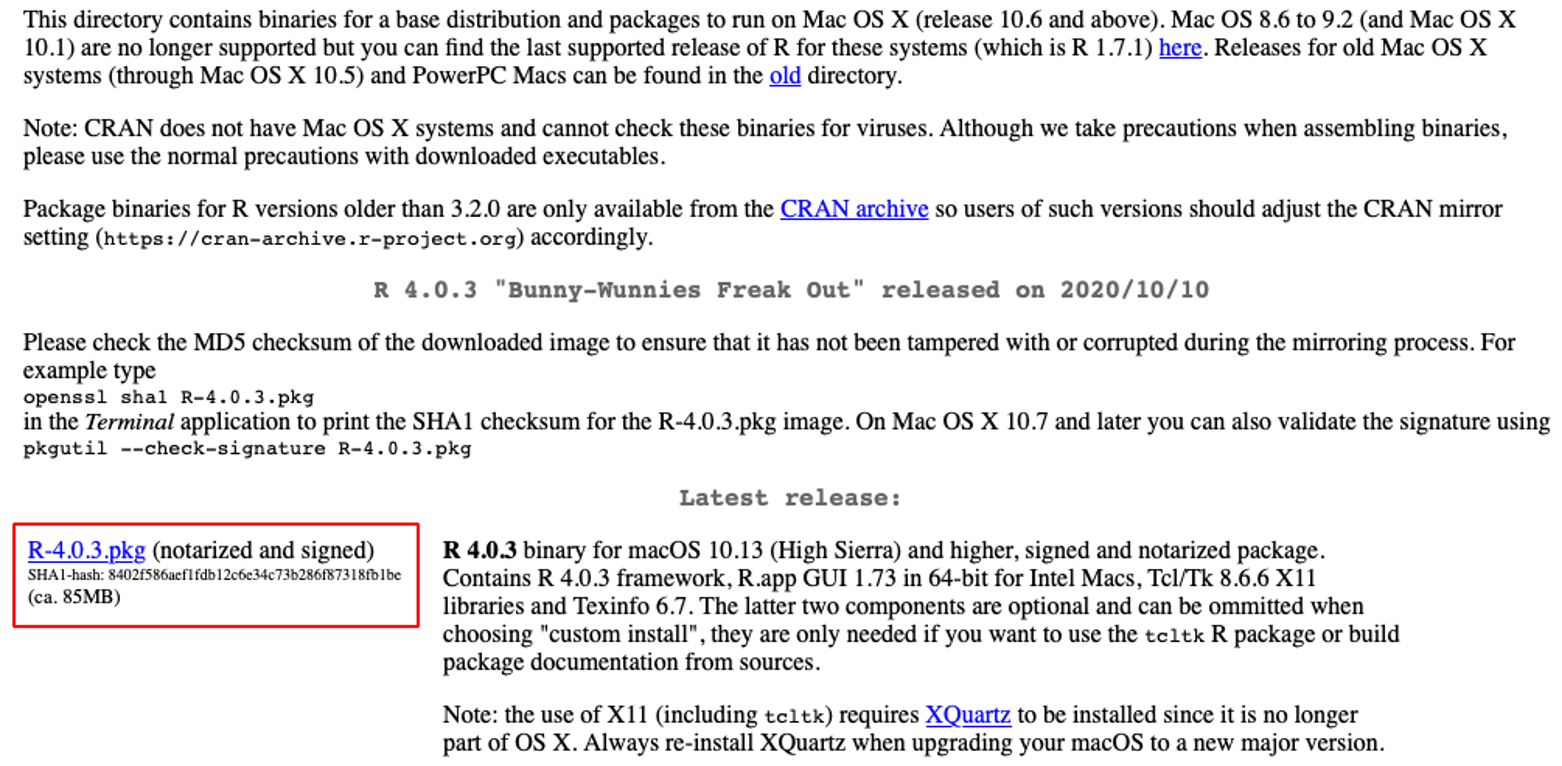 Download the latest .pkg release for macOS
- Launch the installer. You should find the R.pkg installer in your Download folder. On the R Welcome window, click Continue.
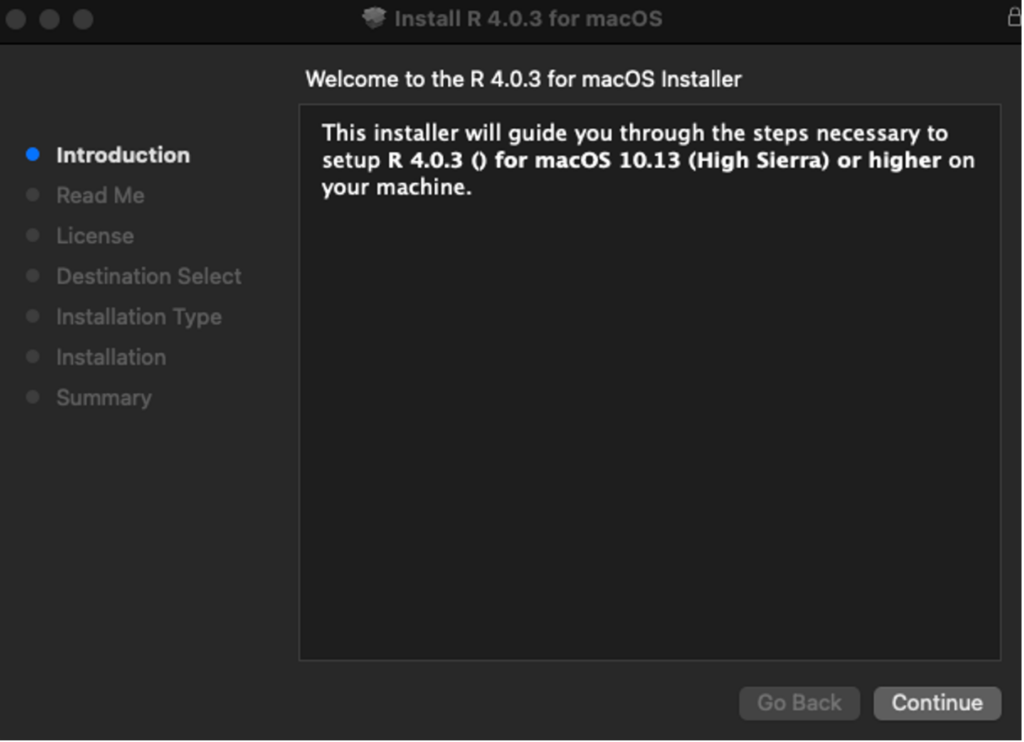 Welcome screen of the R installer on macOS
- Read the Important Information and click Continue.
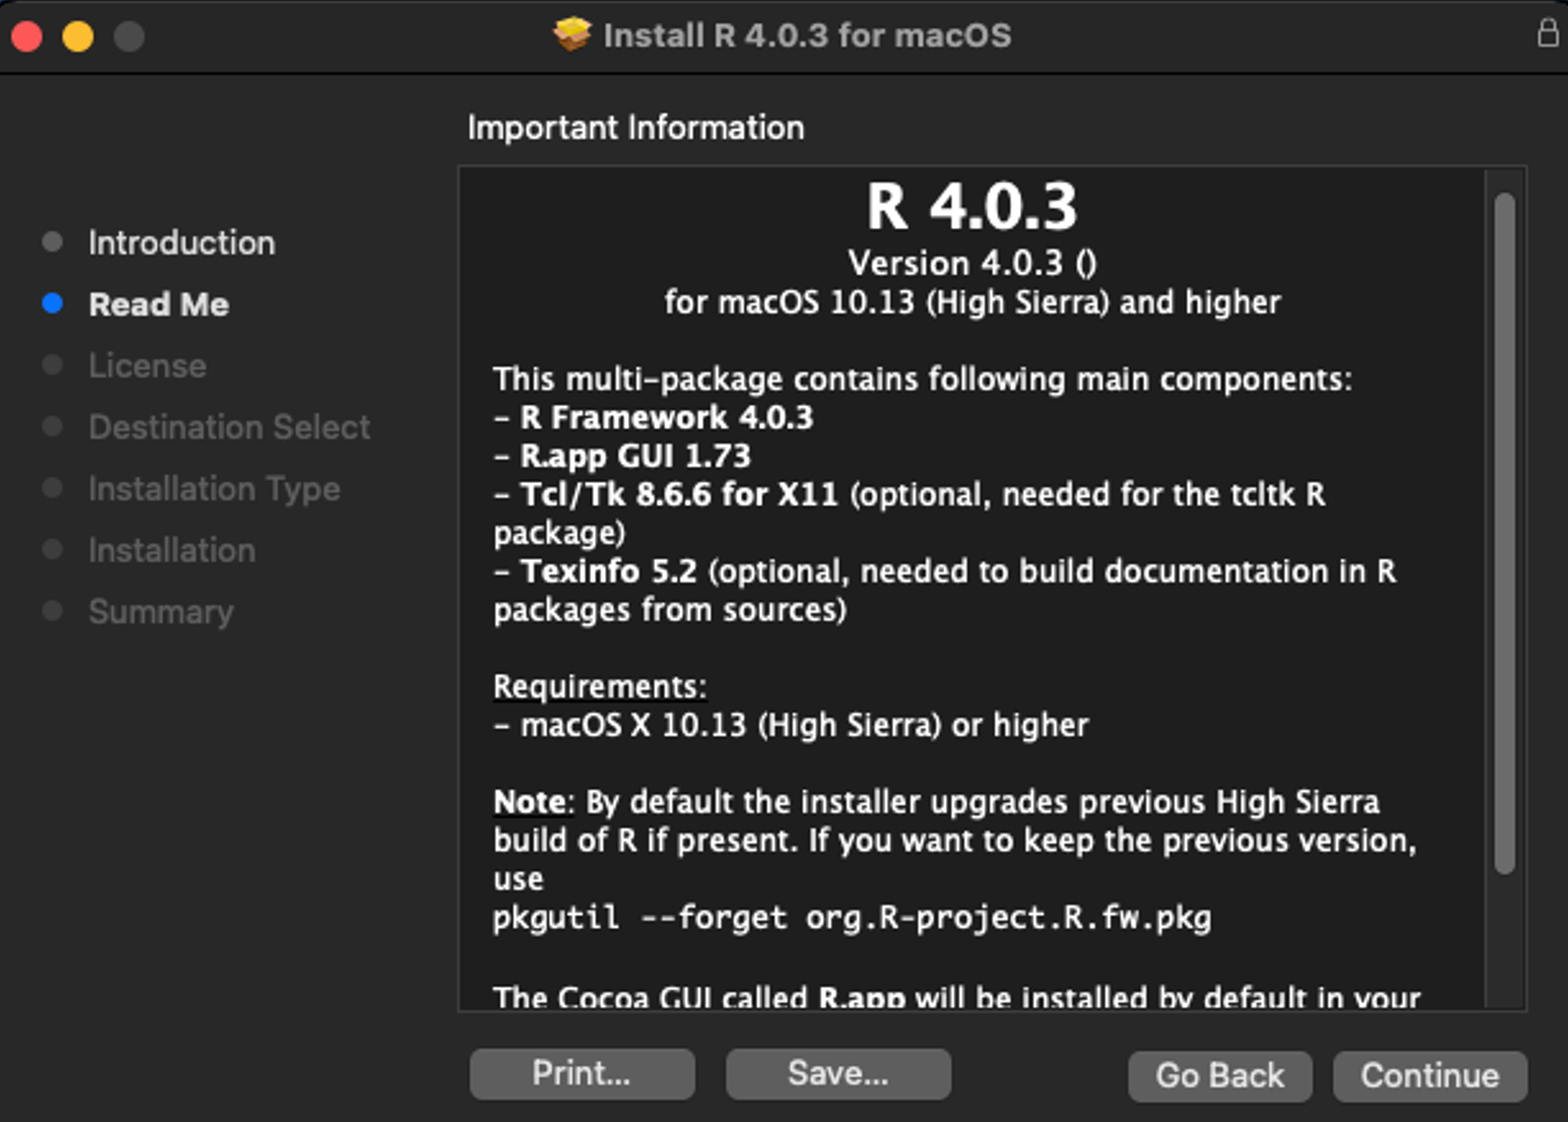 Read the important information about R installation
- Read the Software Licence Agreement and click Continue.
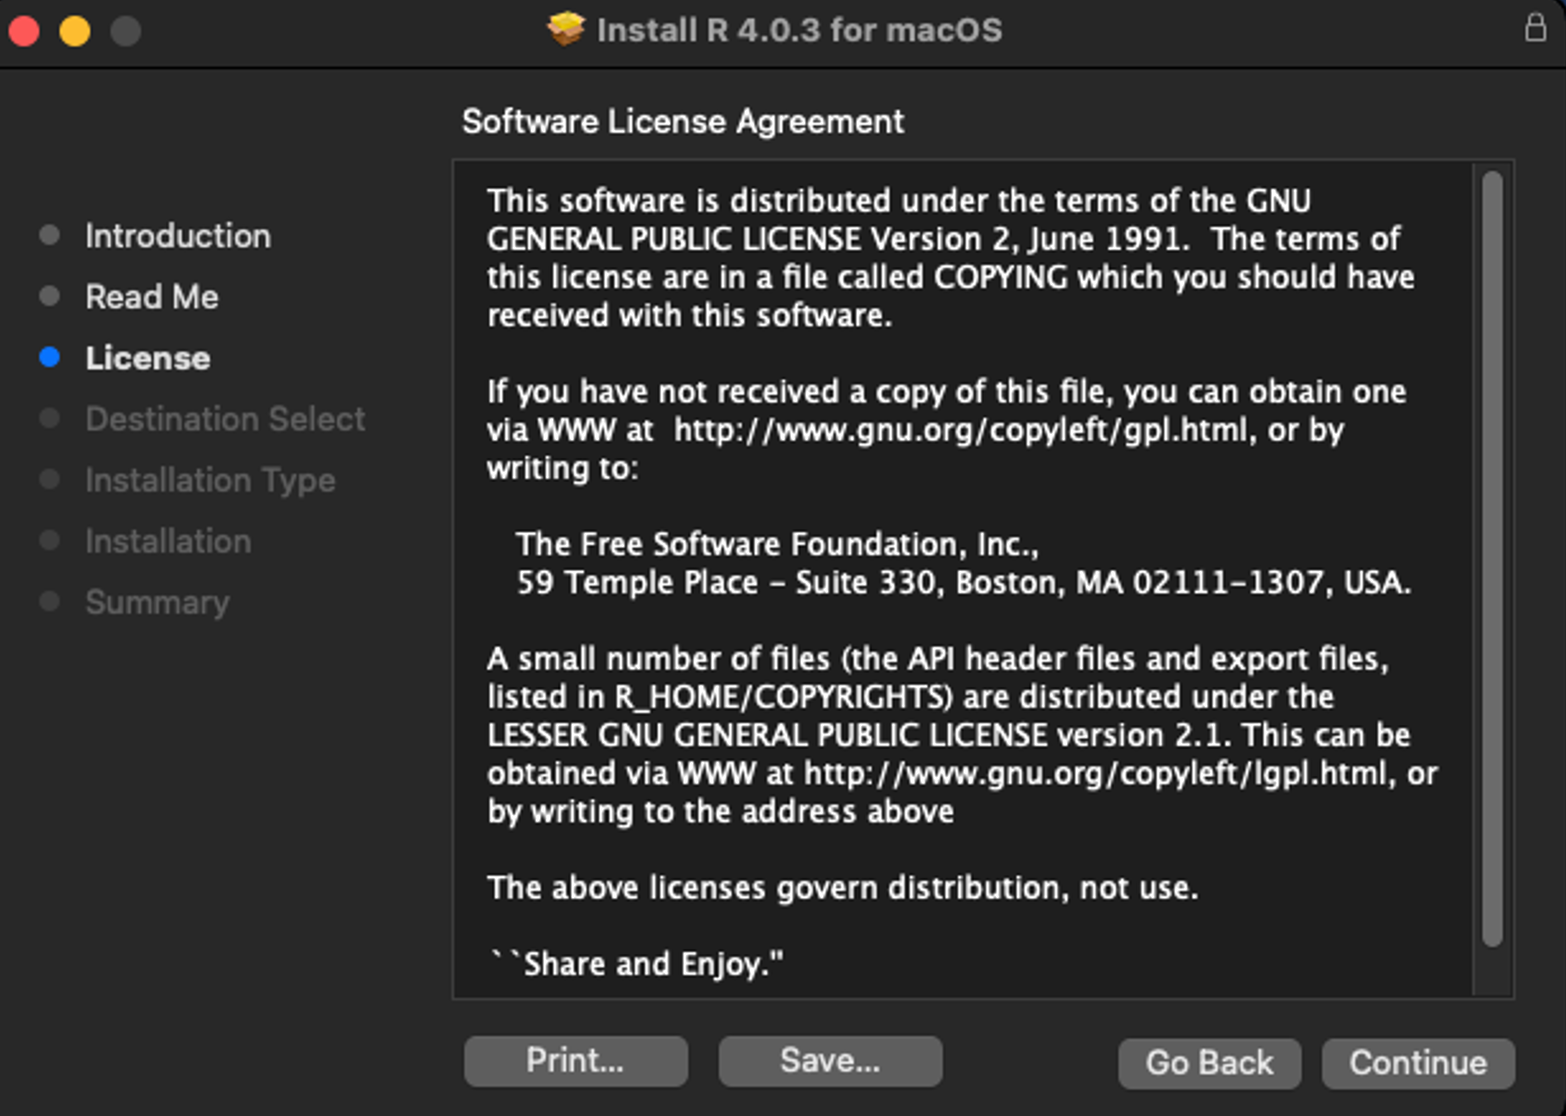 Review the software license agreement
- When prompted to Agree with the Terms Of Software License Agreement, click Agree.
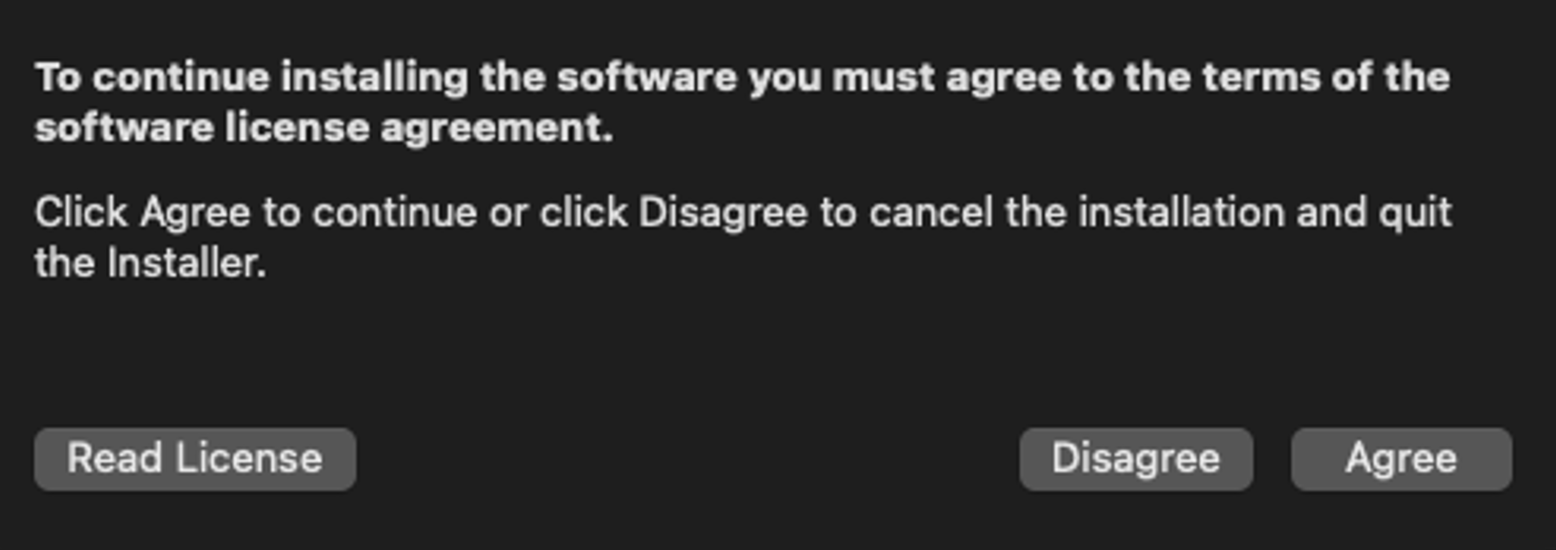 Agree to the terms of the software license
- Click the Install button to start the installation.
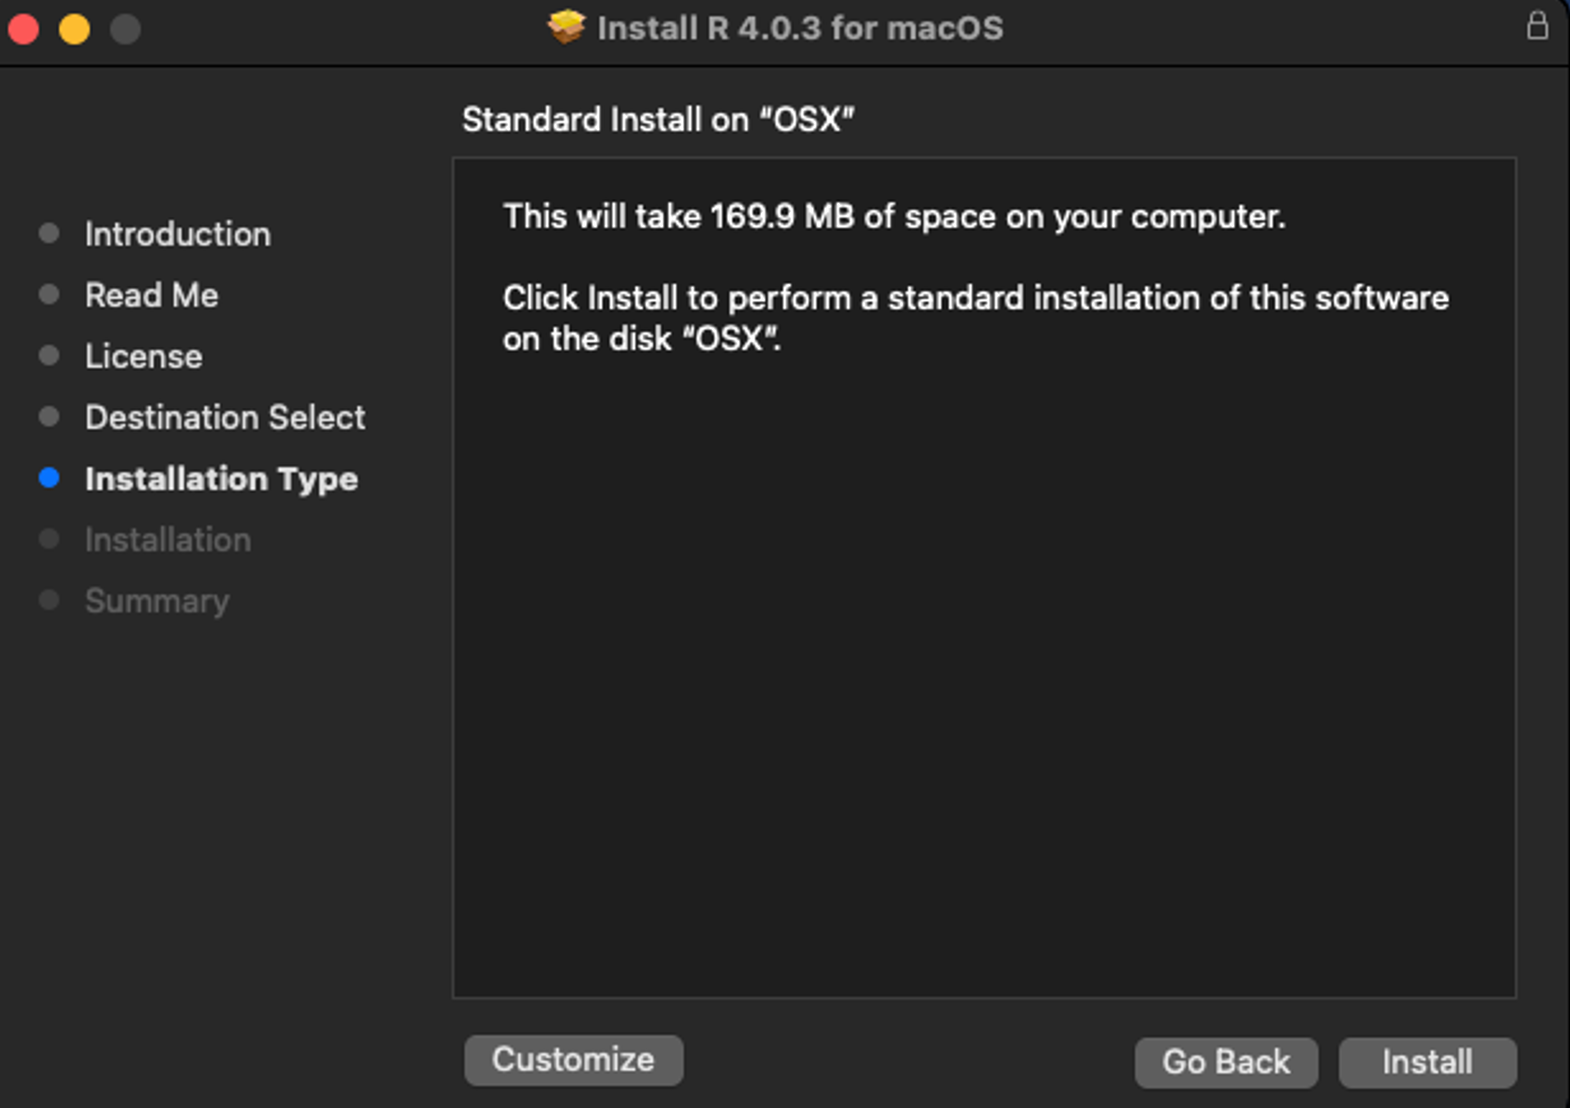 Click Install to begin the R installation
- When prompted, type your user password.
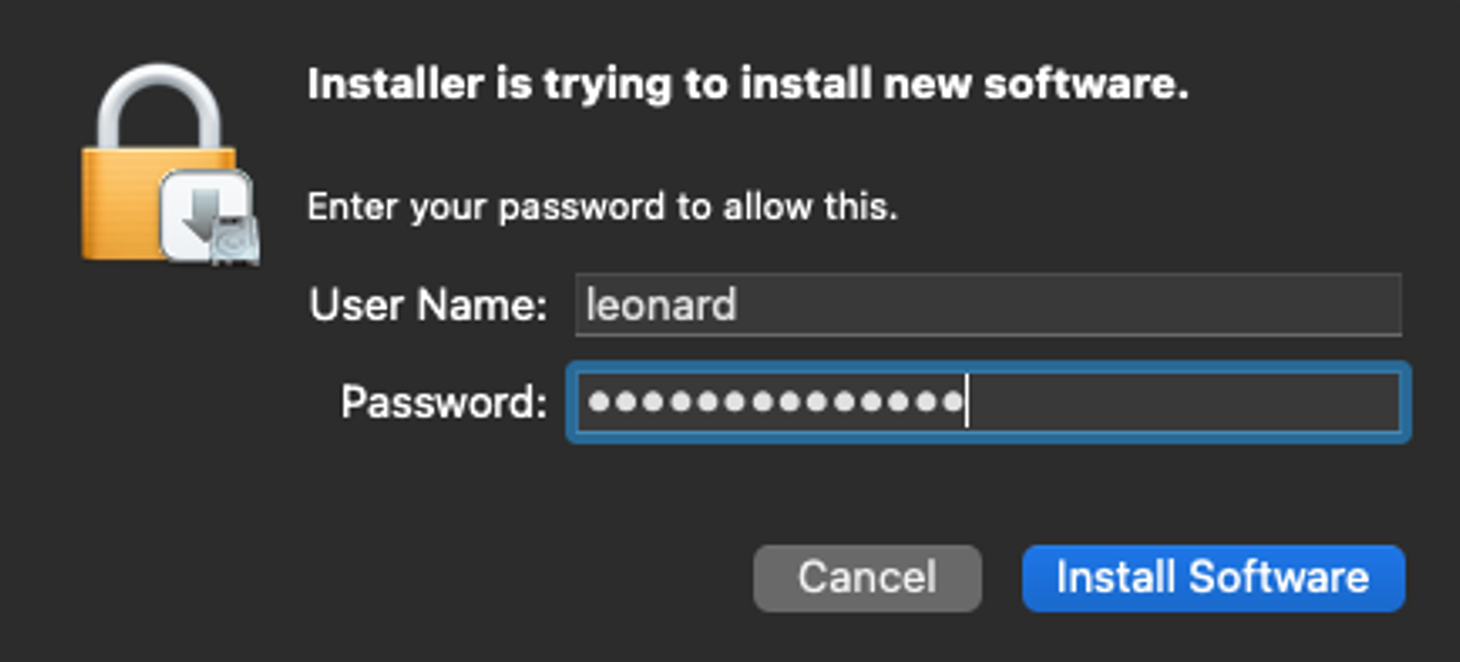 Enter your macOS user password to authorize the installation
- Click the Close button. R is now installed on your macOS computer.
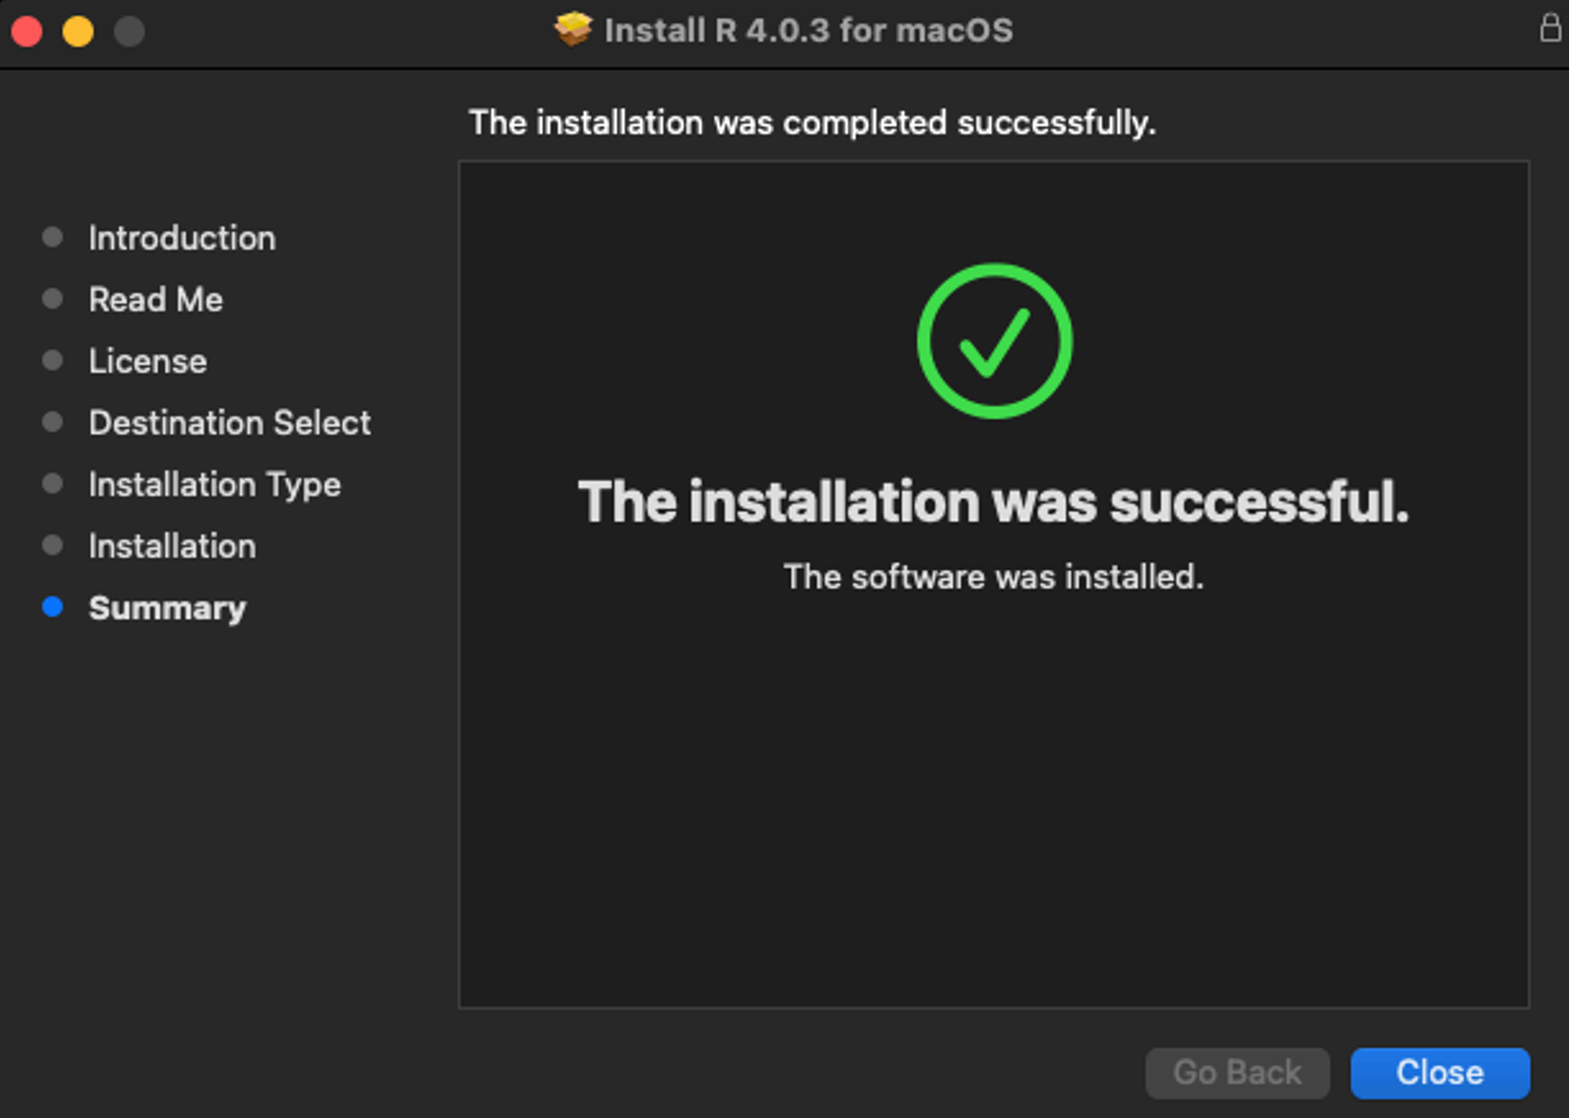 R installation completed successfully on macOS
The RStudio IDE is a collection of tools created to enable coding in R and Python more efficiently. Let's install RStudio on our Mac next.
- To download RStudio Desktop IDE on your macOS machine, navigate to the RStudio Desktop website, scroll down to the All Installers section, and download the macOS 10.13+ installer by clicking the .dmg file.
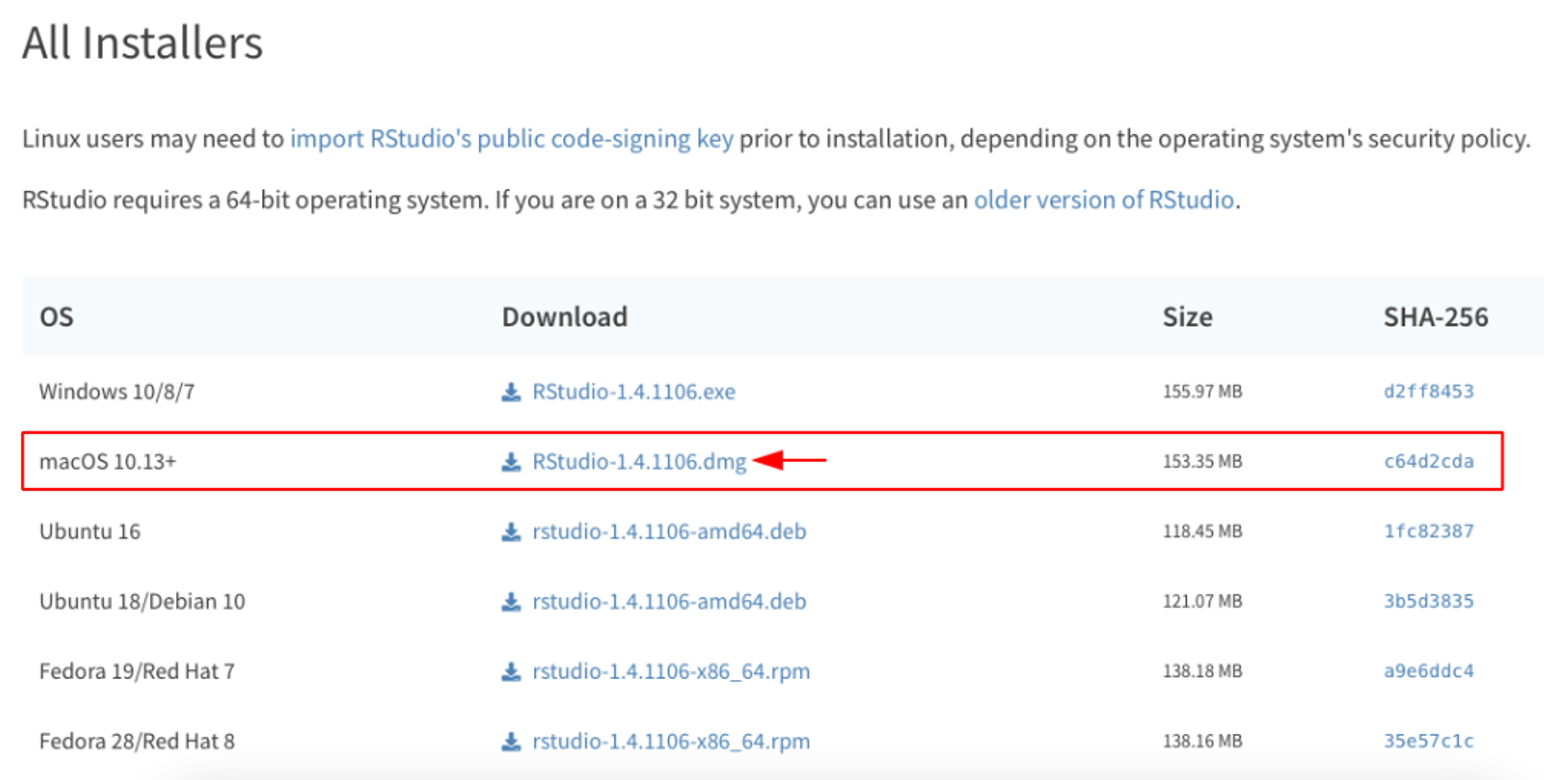 Download the macOS 10.13+ .dmg installer for RStudio
- Once the download is completed, launch the installer, usually located in your Download folder, and drag and drop the RStudio icon on your application folder.
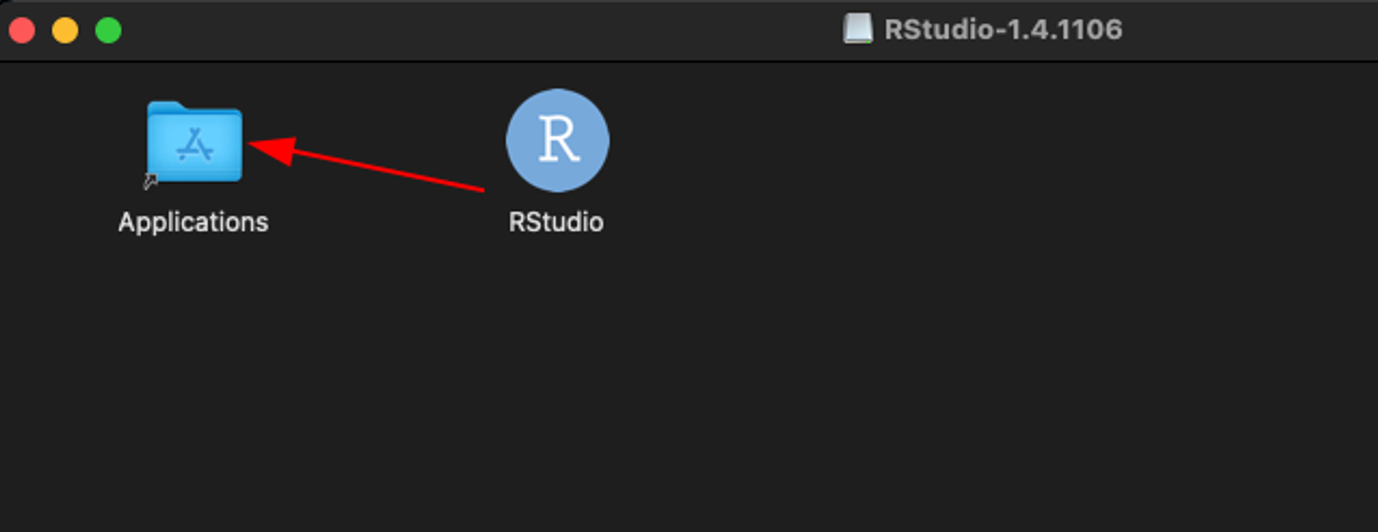 Drag and drop RStudio into your Applications folder
- To launch the RStudio, head over to the Applications folder and double-click on the RStudio icon. When prompted if you want to open an application downloaded from the Internet, click Open.
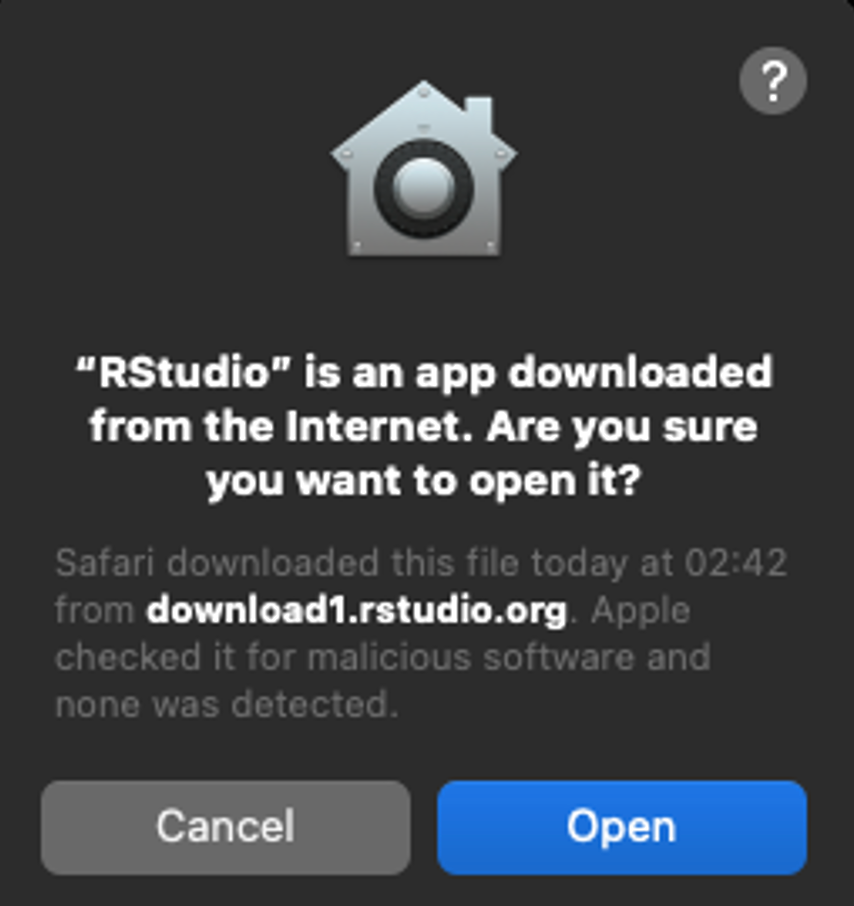 Open RStudio from your Applications folder
- When prompted to Enable Automated Crash Reporting, click Yes.
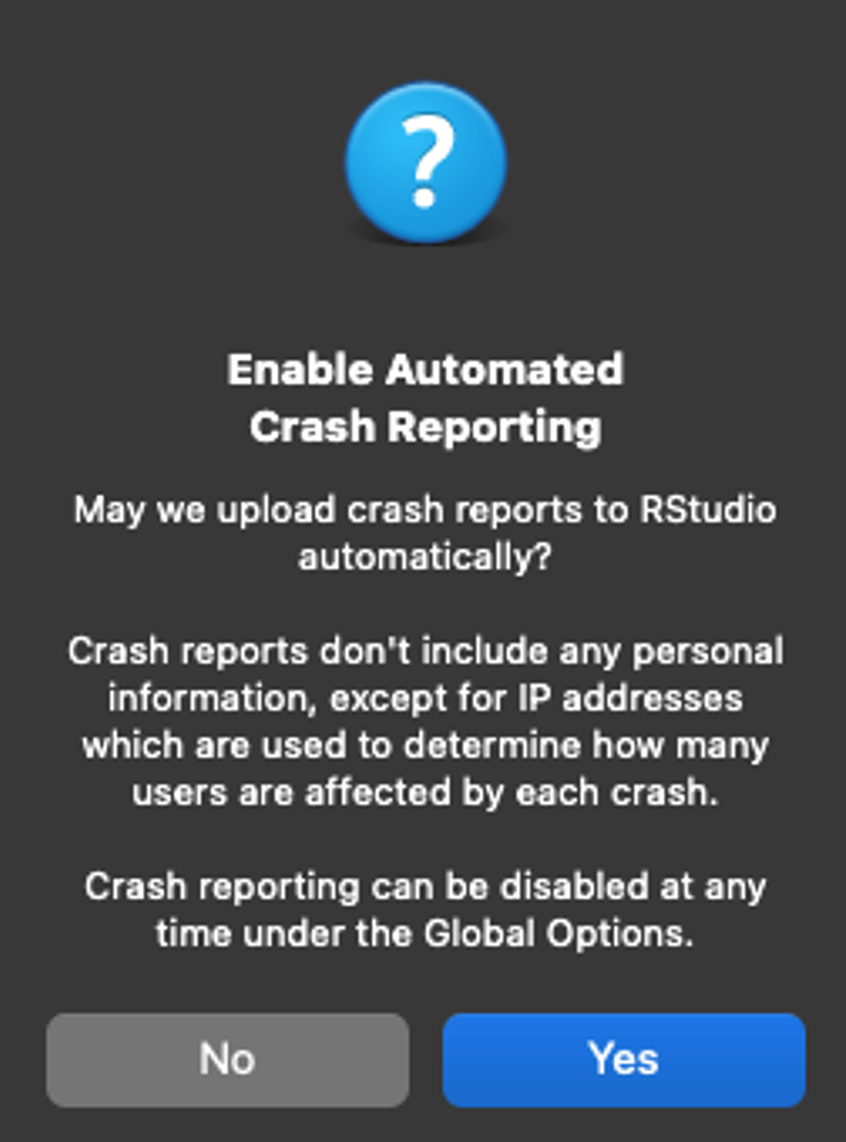 Choose whether to enable automated crash reporting
That’s it. We just installed R and RStudio on macOS. You are now ready to write some cool code in R.
 RStudio successfully running on macOS
Install R and RStudio on Linux
In Linux, we have quite a number of distributions, but all of these distros are basically based on three main Linux branches: Debian (e.g., Ubuntu, Linux Mint, Pop OS, etc.), Red Hat (e.g., Fedora, Cent OS, Suse Linux), and Arch (e.g., Manjaro, Endeavors OS).
Install R and RStudio on Debian-based distributions
R installation on Debian and Debian-based distributions is a straightforward process. In this guide, I will install R on Ubuntu. The installation method should be the same for all recent Ubuntu versions.
- To install R on Ubuntu, open a terminal and type:
` sudo apt -y install r-base`
- To install RStudio on Ubuntu, open a browser and head over to the RStudio Desktop website, scroll down to the All Installers section and select the Ubuntu 18/Debian 10 .deb package.
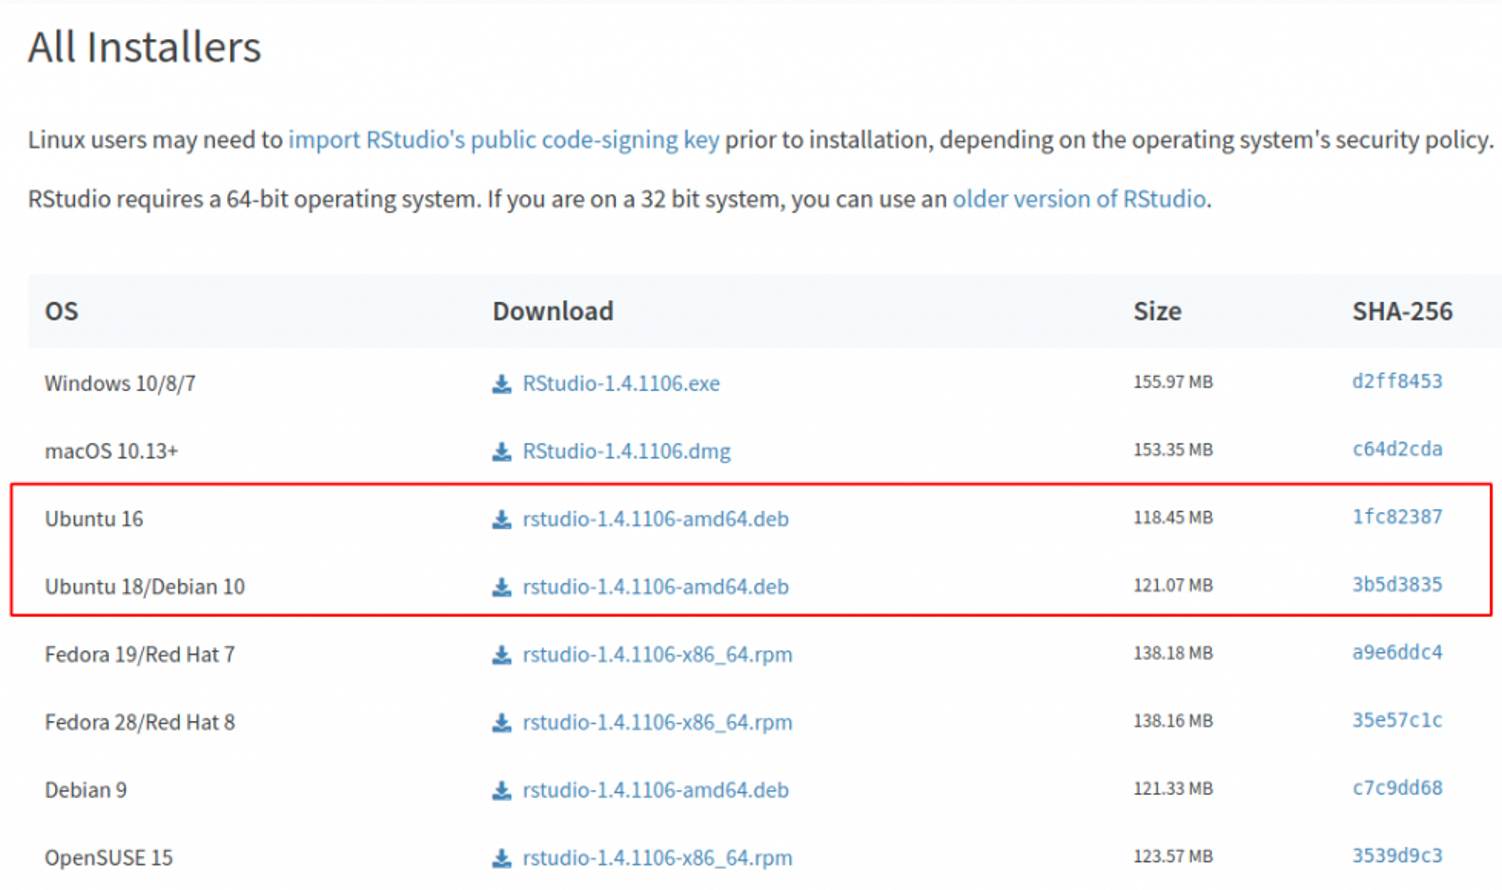 Select the Ubuntu 18/Debian 10 .deb package
- When prompted, select Save to download the file on your computer.
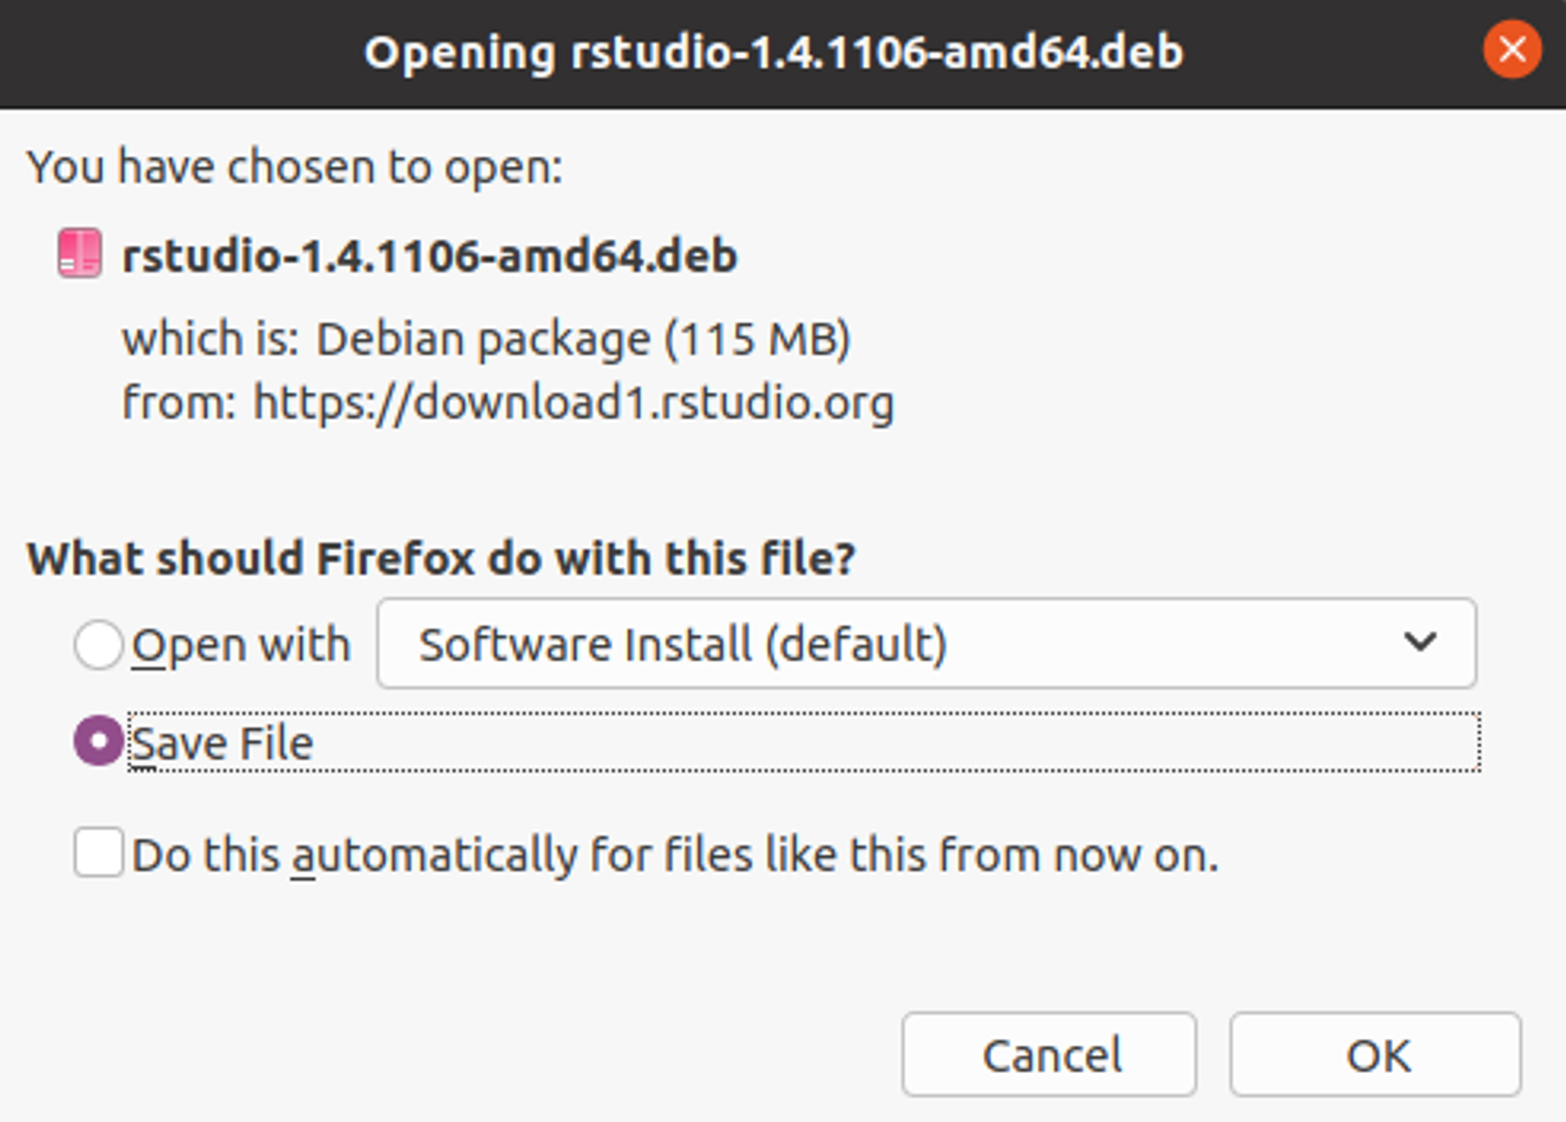 Save the RStudio .deb file to your computer
- Navigate to your Download folder, right-click and select the Open in Terminal option. Alternatively, you can navigate to the Download folder using cd ~/download in the terminal.
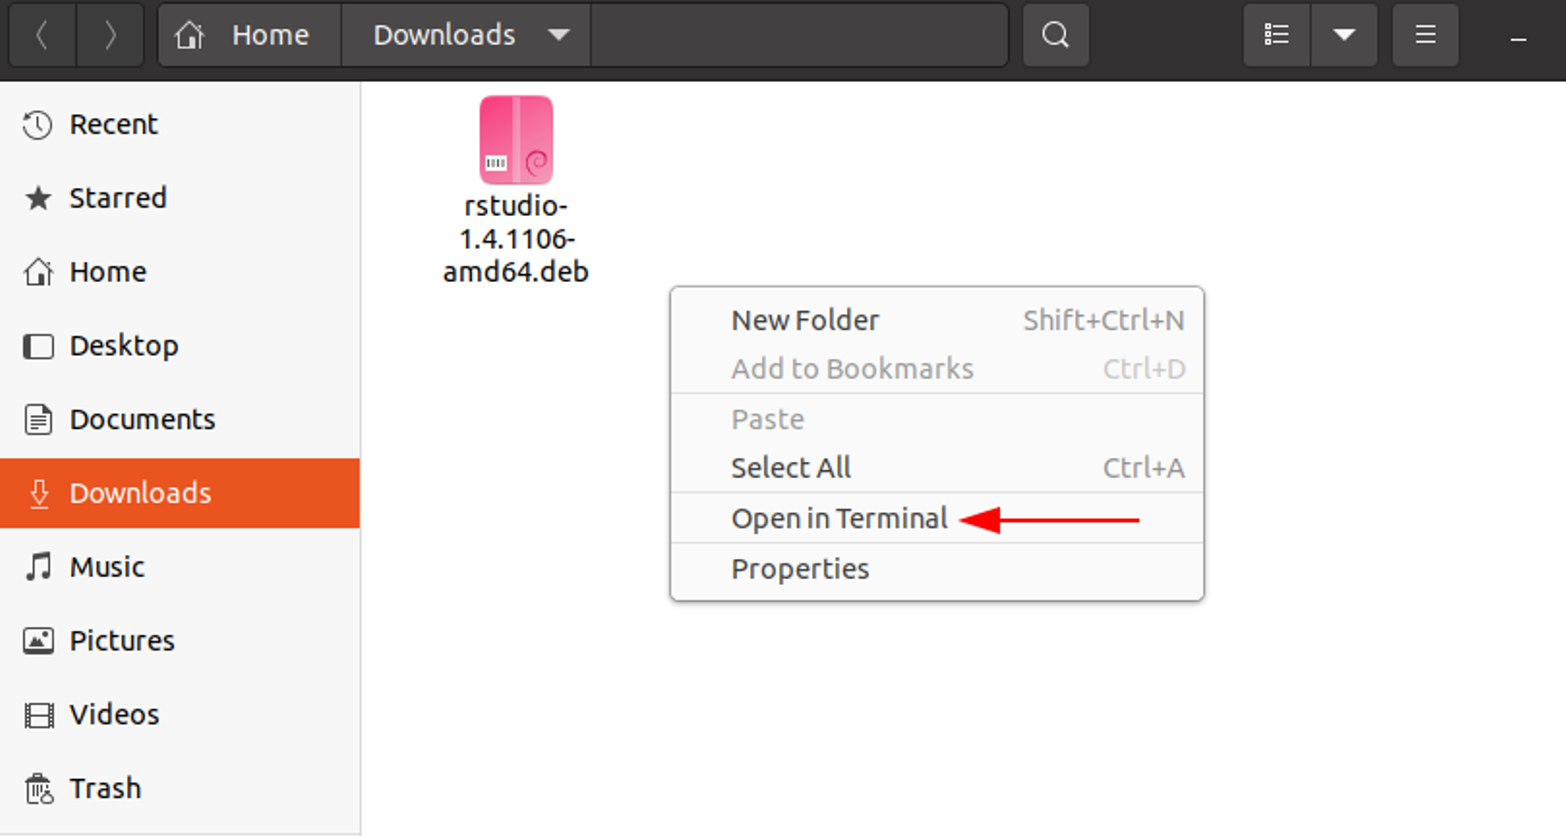 Navigate to your Downloads folder and open terminal
- To install the RStudio .deb package, type in the terminal the following command and use the Tab key on your keyboard to autocomplete the name of the file.
` sudo dpkg -i rstudio<Hit Tab Key>`
- If the installer complains about any missing dependencies, type in the terminal the following command:
` sudo apt --fix-broken install`
Alternatively, you can use the following command to fix any broken dependencies:
` sudo apt -f install`
- To launch RStudio, find the application in your App Launcher or type in the terminal:
rstudio
When prompted to Enable Automated Crash Reporting, click Yes.
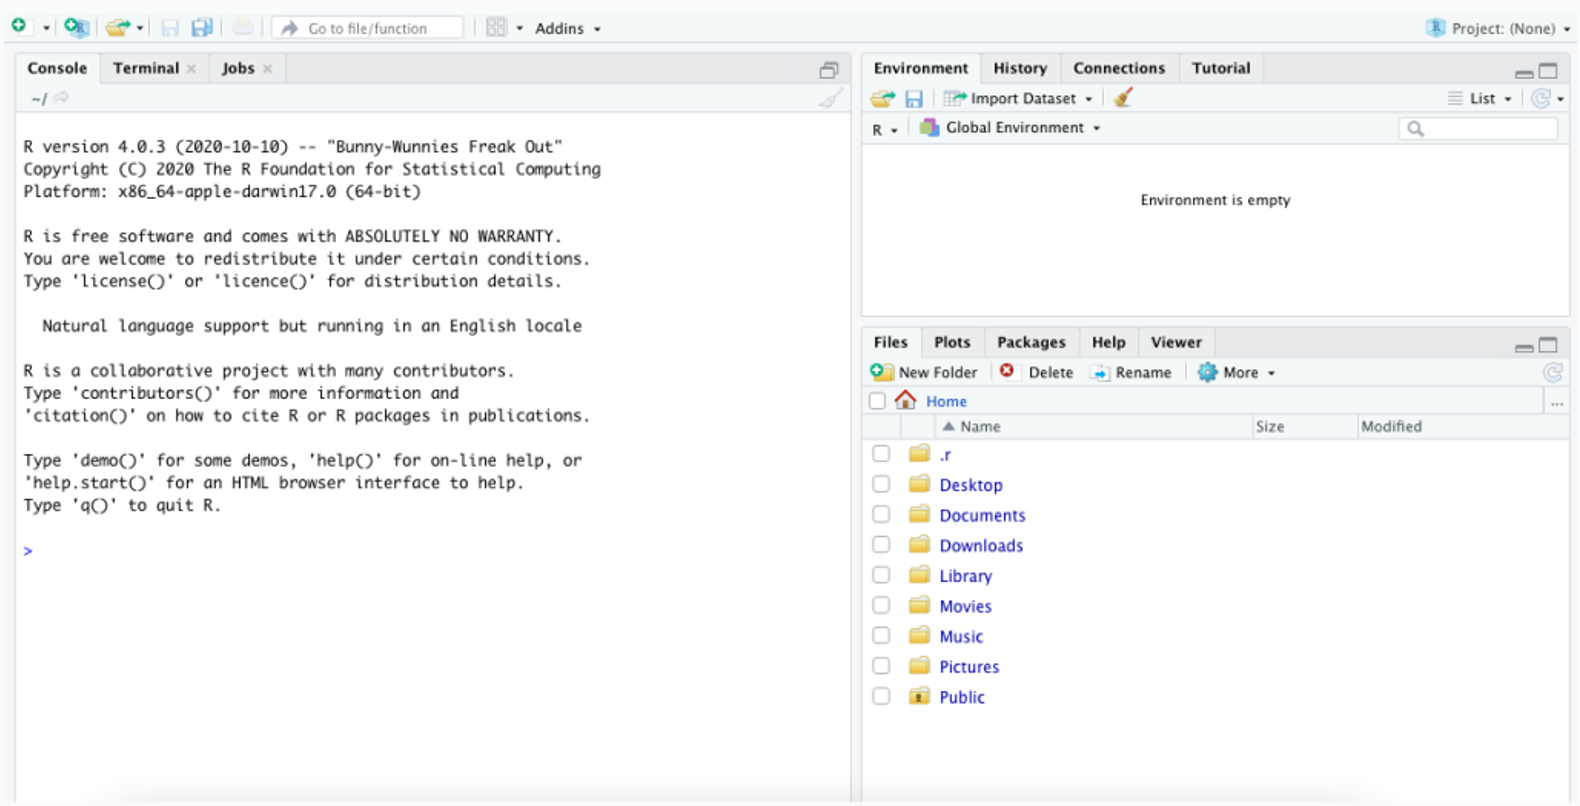
That's it! You just installed R and RStudio on Ubuntu.
 RStudio successfully running on Ubuntu Linux
Install R and RStudio on RPM-based distributions
Follow this guide if you are using an RPM-based Linux distribution such as RHEL, Fedora, Cent OS, etc. In this guide, I am going to use Fedora.
- To install R on Fedora, open a terminal and type:
` sudo yum install R`
- To install RStudio on Fedora, open a browser and head over to the RStudio Desktop website, scroll down to the All Installers section and select the Fedora 28/Red Hat 8 .rpm package.
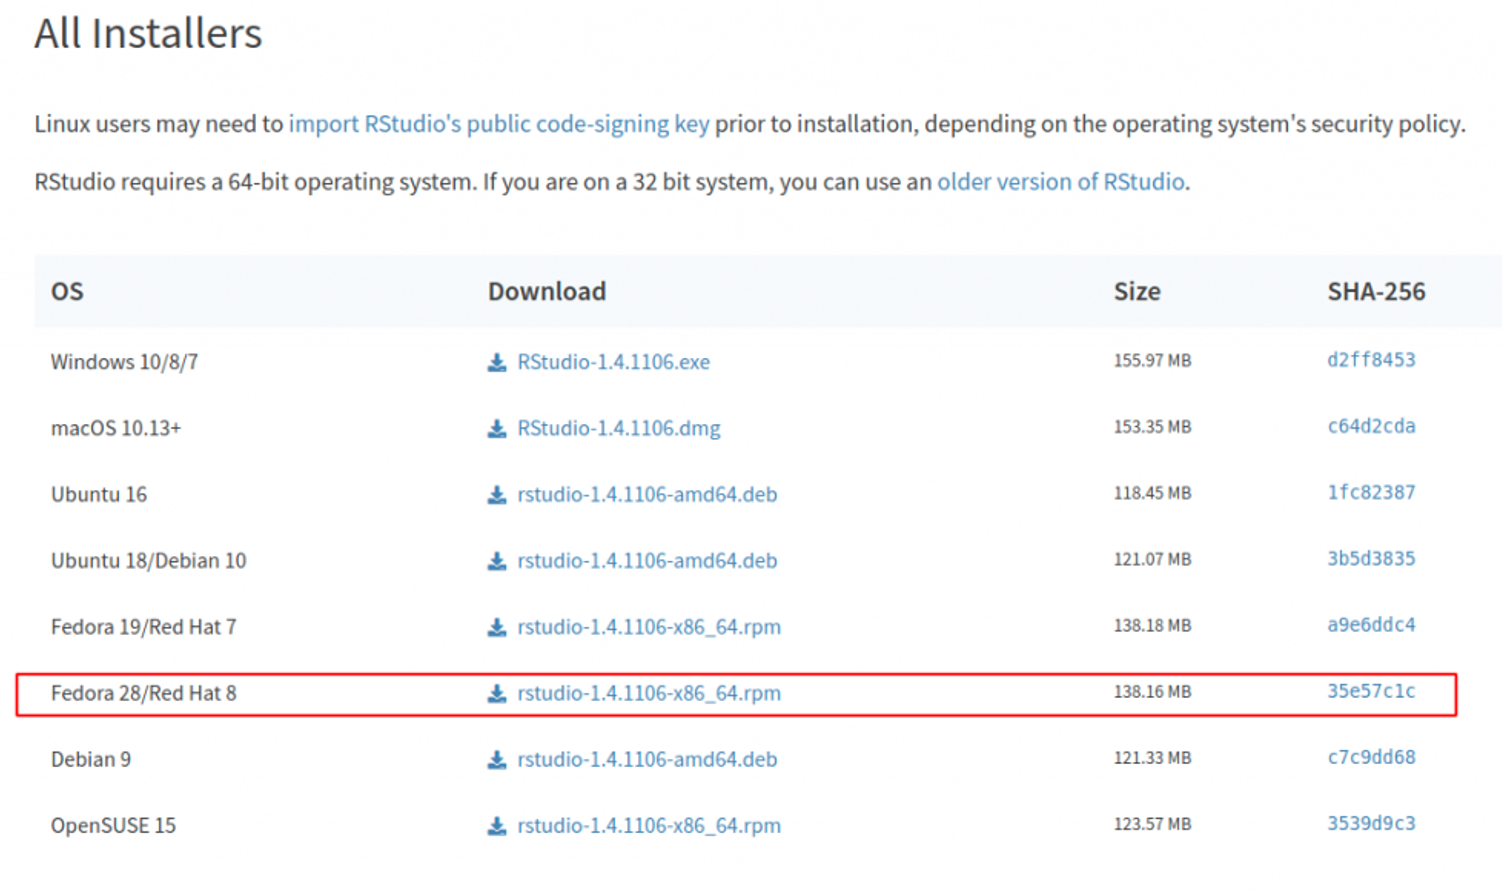 Download the Fedora 28/Red Hat 8 .rpm package
- When prompted, select Save to download the file on your computer. Navigate to your Download folder and double-click on the.rpm file you just downloaded. The Software Manager window will open. Click Install.
 Click Install in the Software Manager window
- Once the RStudio package is installed, click the Launch button.
 Click Launch after installation completes
When prompted to Enable Automated Crash Reporting, click Yes.
You are now ready to write code in R on your RPM-based operating system.
 RStudio successfully running on Fedora
Install R and RStudio on Arch-based distributions
Follow this guide if you are using Arch or any other Arch-based Linux distribution. In this guide, I am going to use Manjaro.
- To Install R language on Arch-based systems, open a terminal and type:
` sudo pacman -S r`
Type Y when prompted to proceed with the installation.
- Install RStudio IDE. To install RStudio, in the terminal type:
` pamac build rstudio-desktop-bin`
- Launch RStudio from the application launcher or by typing in the terminal:
`Rstudio-bin`
When prompted to Enable Automated Crash Reporting, click Yes.
 RStudio successfully running on Manjaro (Arch-based distribution)
And just like that, we managed to install R and RStudio on an Arch-based distribution.
Install R and RStudio on UNIX [FreeBSD]
For UNIX, I chose the most popular UNIX distribution out there: FreeBSD. In this guide, I am using FreeBSD with GNOME Desktop Environment but the same installation procedure applies to other Desktop Environments or Windows Managers out there.
- Install R language by opening a terminal, switching to the root user (su -), and typing:
` pkg install r`
Bam! The R language is installed on FreeBSD!
- Install RStudio IDE on FreeBSD. To install RStudio, in the terminal type as root:
` pkg install RStudio`
Alternatively, you can build the RStudio package from freshports by running the following command as root:
` cd /usr/ports/devel/RStudio/ && make install clean`
[Optional] RStudio requires /proc to be mounted in /etc/fstab. To edit /etc/fstab, use the ee text editor or install nano using the following command as root:
` pkg install nano`
- Next, edit the /etc/fstab:
` nano /etc/fstab`
- Add the following line into the /etc/fstab file:
` proc /proc procfs rw 0 0`
Your /etc/fstab file should look like this after adding the above line:
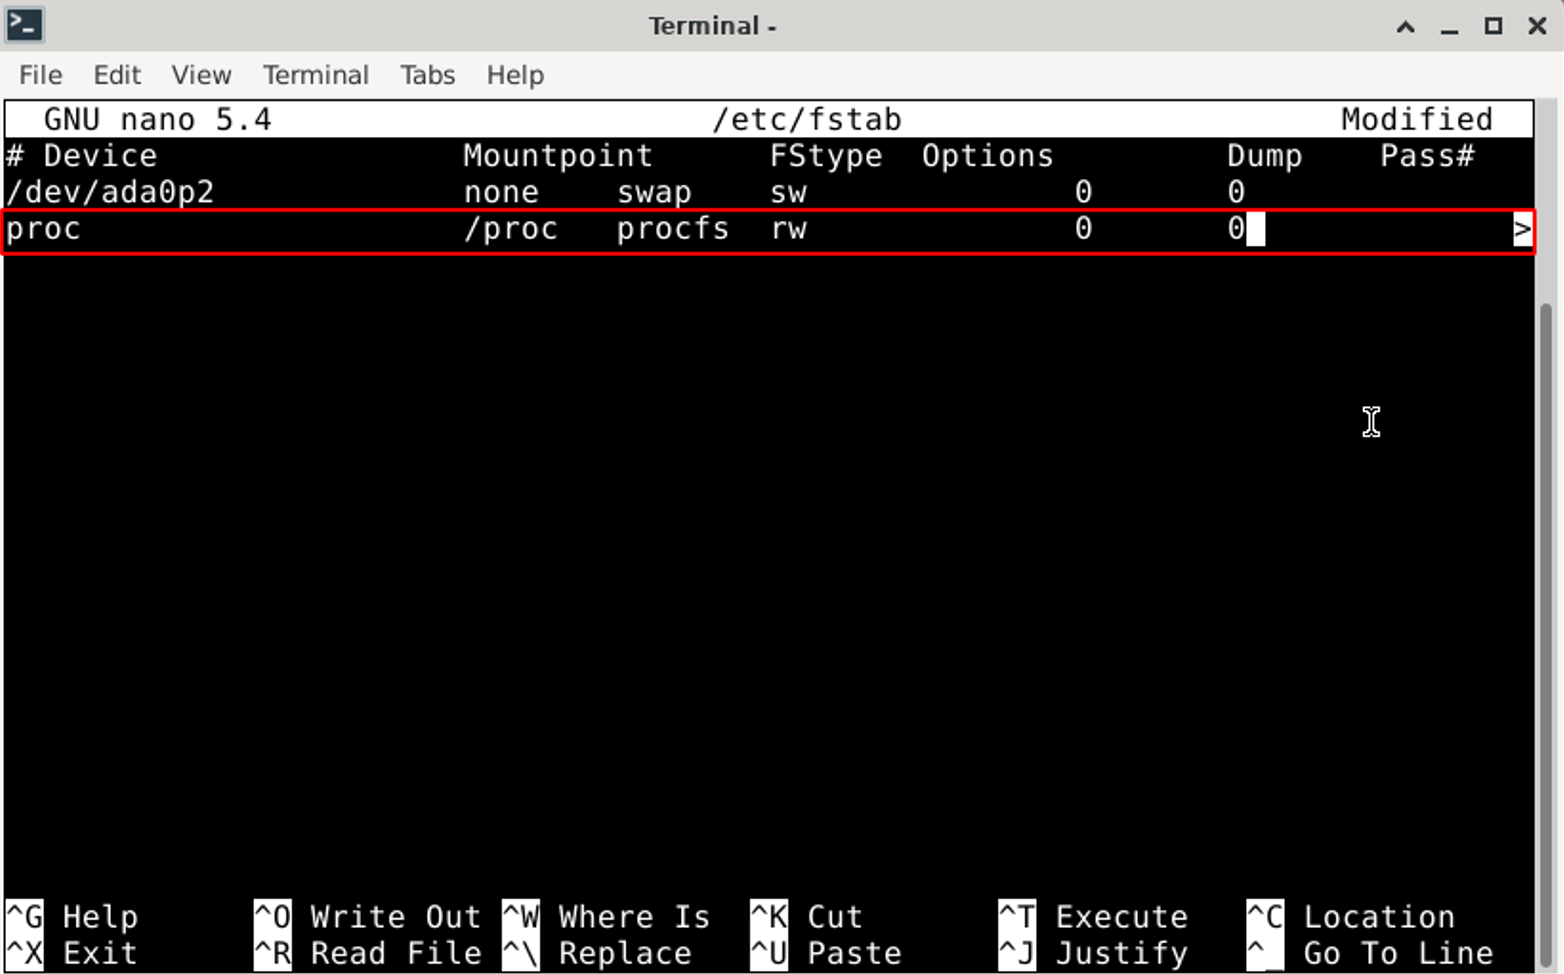 Edit /etc/fstab to mount /proc on FreeBSD
Save and quit the fstab file (press Ctrl+X then type Y to save).
- Mount /proc by running the following command:
` mount /proc`
- You can launch RStudio by launching the app or typing in the terminal:
`rstudio`
You are now ready to write code in R on FreeBSD operating system.
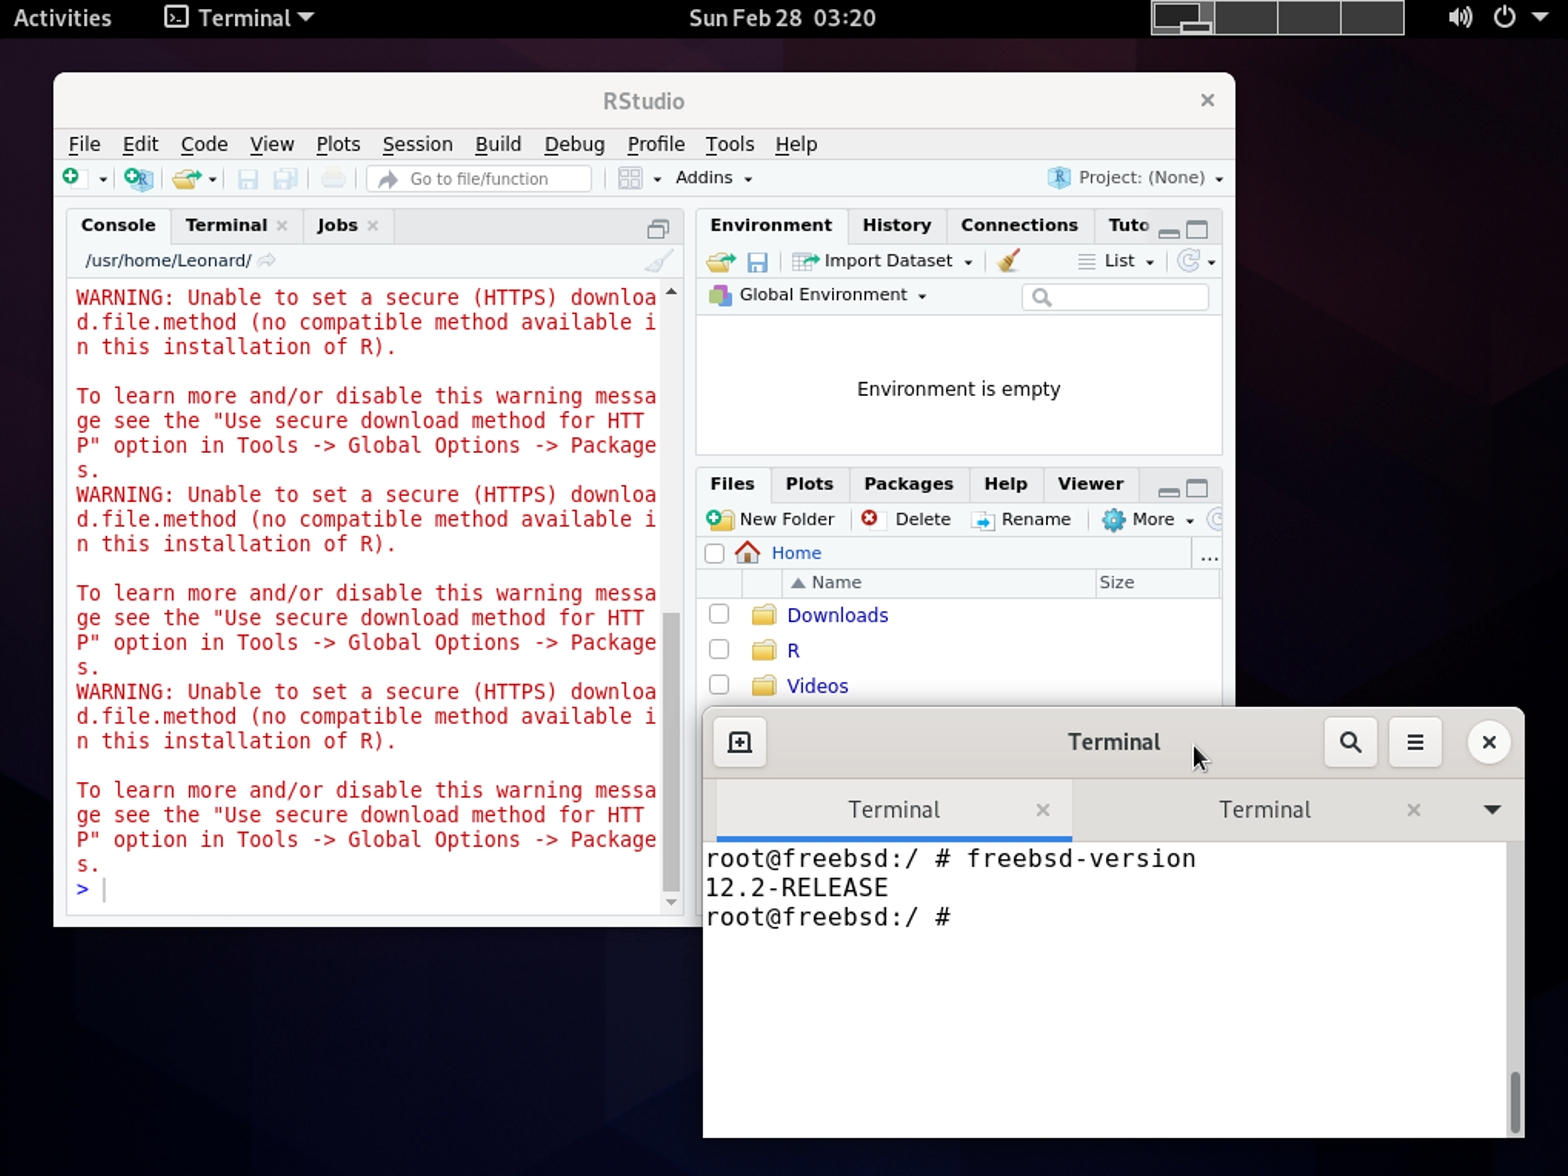 RStudio successfully running on FreeBSD
Frequently Asked Questions
Wrapping Up
In this article, we learned how to install R and RStudio on Windows, macOS, Linux, and UNIX [FreeBSD] operating systems.
Installing R and RStudio on any operating system is straightforward and takes just 5-10 minutes. Ready to start analyzing data? Learn how to calculate standard deviation in R to begin your data analysis journey.